Adding SketchUp Models to ArcGIS Urban

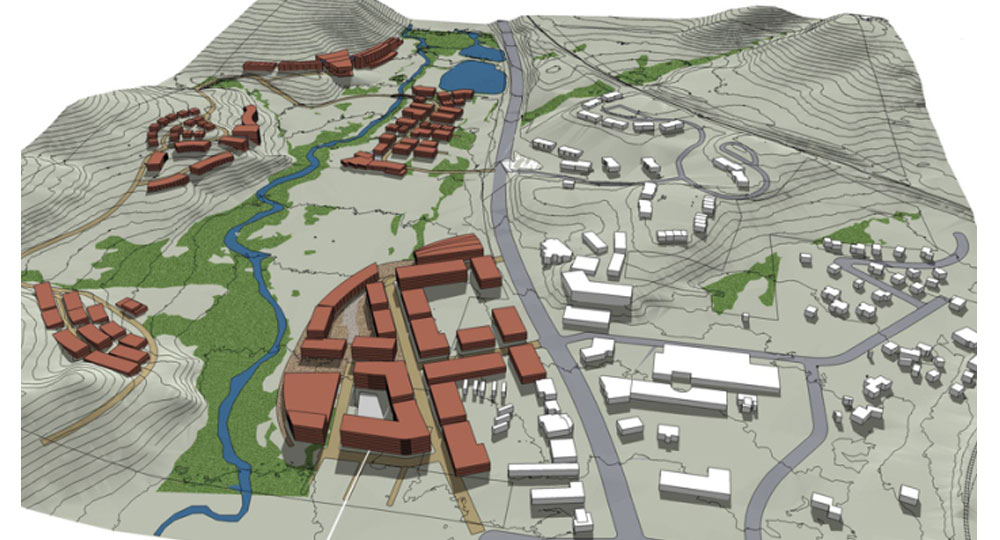
With the fourth technological wave incoming, more and more construction firms and government authorities are switching to 3D visualization of building projects before they accept the proposal. The requirement of truly look at a scene of how the project will look like – not just imagine in via abstract drawings – is becoming the standard. Using ArcGIS Urban, you can let your client or boss look at how the project will look in real life setting, but to do that, you will need to know how to use your CAD models in ArcGIS Urban.
In this guide, we will discuss how to import and utilize a SketchUp model in ArcGIS Urban. We will explore the steps to export the SketchUp model to the right format, importing it into ArcGIS Pro, upload it to ArcGIS Online, and finally publishing it on ArcGIS Urban. Let’s go!
Export the SketchUp Model
- Open your building model in SketchUp.
- Select the entire model. You can use drag selection or “ select all ” option from menu. There is also the Ctrl+A shortcut.
- Right-click the selected model. Select “ Make Component ”.
- The component creation box appears. You can put a name and other properties here.
- Uncheck “ replace section ” box, and click “ create ”.
- Now go to the Export menu (in File menu) and then choose to export as COLLADA (.dae) file.
Import the model to ArcGIS Pro
- Open a new ArcGIS Pro project. Use a “ Local Scene ”.
- Right click “ File Geodatabase ” in the Catalog tab.
- Select New > Feature
- A box opens. Give a Name and an Alias here.
- Select “ Multipatch ” in the feature class type drop-down.
- Click Finish to get out of the box.
- Go to the Edit tab to click on Create .
- Find the model file option and click on the green plus sign beside it.
- A file choice box opens. Select the .DAE file you’ve just exported from SketchUp and click on Ok.
- The model will snap to your mouse cursor. Use that to move the model to where it should be placed on the map, and click there. Be careful in this step.
- Save your project. ( Edit>Save ).
Upload to ArcGIS Online
- Click Table of Contents and right click on the Multipatch Feature Layer.
- Select “ Sharing ” and click on “ Share as Web Layer ”.
- A box should appear asking for various info about this model. Fill it up as necessary. You must input a Name and select a few tags.
- You can choose to save your model into a specific Folder if you want. It’s not necessary, but it’s a good organizational practice.
- You should also choose who to share the model to. If unsure, just select “ Everyone ”.
- Click on Publish and your model will be uploaded!
Verify it in ArcGIS Online
- Open your ArcGIS Online Organization and sign in.
- Browse and find your uploaded model. It will be saved as a Scene Layer , found inside Contents .
- Click the thumbnail to open the Scene layer . It will create a Scene to show the model.
- Check if it looks all right here.
Add the Multipatch model into ArcGIS Urban
- Open the ArcGIS Urban Model into which you wanted the building model to fit.
- Click Add and then select Projects .
- Go to Project Polygon > Draw and click on “ Add Project ”.
- A box will appear asking for some information. Fill out the details as you want. You must give a Name here.
- Press Ok to accept the model. A new project is created. Select it.
- Click on Options and select Configure .
- In the next box, open the Scenarios tab and select a scenario.
- There will be Scene Layers available under the Design Visualization Find yours.
- Select the Scene Layer you’ve just uploaded to and viewed in ArcGIS Online, and click Ok, and Ok
- This will open up the Urban view , with your model sitting pretty in the exact location you’ve placed it in.
Note: you can always select the model and use Edit Tools to adjust and fit the model in the exact position. When done, make sure you Save the project before proceeding.
That’s it, you’re done! Now you can show your pretty model off in the real-life setting as it is intended to become.

- Sketchup Tips & Tricks
-
 SketchUp Now Handles..
 -
 How Can You Make..
 -
 Virtual Design..
 -
 Adding SketchUp Models..
 -
 August Update Rolls..
 -
 ArielVision vs IRender nXt..
 -
 How to Supercharge..
 -
 Top 10 SketchUp Plugins..
 -
 RpTreeMaker plug-in..
 -
 FredoTools Sketchup Plugin
 -
 MIO PlasticForms - 3D..
 -
 Revisiting SketchUp Pro..


