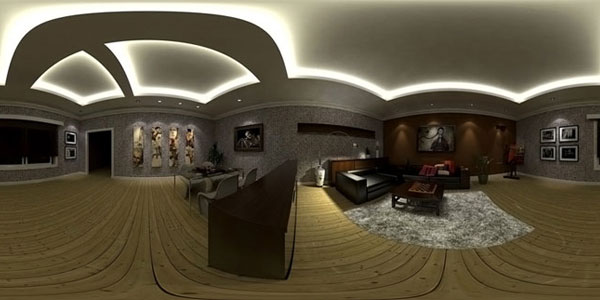
This is a work in progress. My interest in creating a VR can be traced long time ago. way way back when I was using Max Release 1.5. I would like to try one here using Google Sketchup right after I posted and interesting tutorial using Vray for Rhino.
How did I start in SketchUp?
Here is a screen grab on the scene I used for my IES tutorial. Basically, I placed my camera in the middle of the room. I created a line and place the camera here.
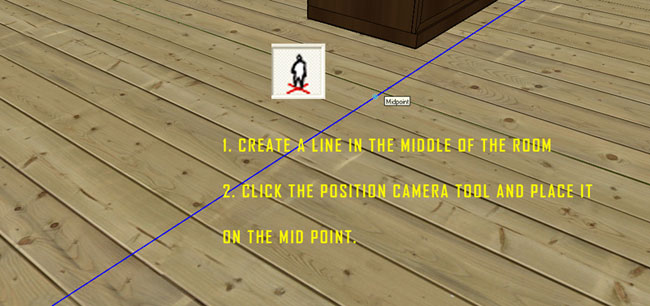 |
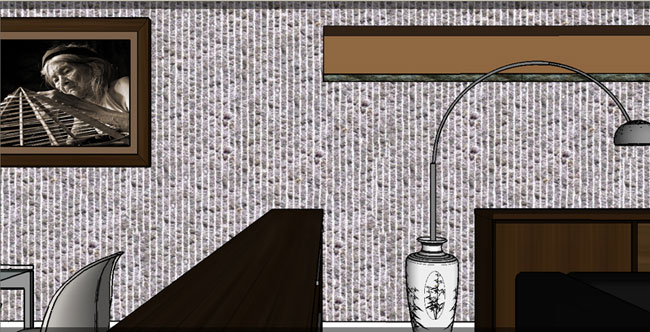
All you need to do is to adjust the height of the camera by moving it long the Z axis. Here is my screen grab. The camera is about 1.2 meter above the floor level.
 |
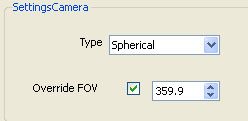
Camera type:. In Vray SKetchup the Camera type must be Spherical and the Field of View (FOV) must be 359.9 degrees.
 |
4. Image aspect ratio
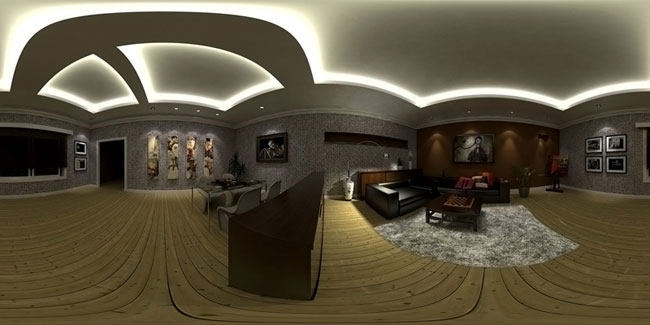
Lastly the image aspect ratio in vray must be 2.0 where the width is 2 times the height. In the Vray output size, tick Override Viewport. Image below shows the image output I am using.
 |
Here is the render
 |
Virtual Reality Tutorial Part 2
First of all if you are looking and interested with Panorama. This is a good site to visit.
It is important to Vray SketchUp will create your panoramas but not the movie. Therefore you will need a different piece of software - a "viewer" to display the panorama as a movie or in the web page. The viewer like Quicktime for instance need two things: first the image itself, and second the information about the image, such as whether it is 360 degrees wide or less than that, whether the image file is cylindrical2 or spherical2, cubic, fish eye, projection, etc. Using quicktime, flash are excellent since you dont have to use web to view them. All you need is a flash player movie or a quicktime movie.
Here is the simple workflow how to put now your spherical render.
Workflow 1: Using Pano2VR.
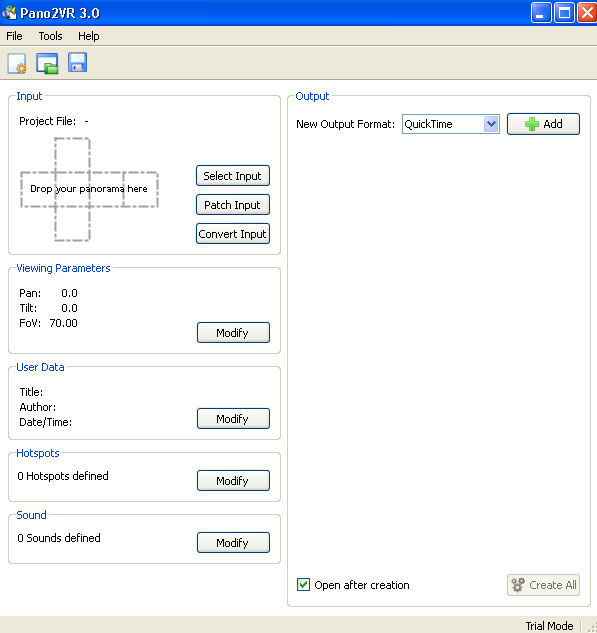
Step 1: Open Pano2VR
 |
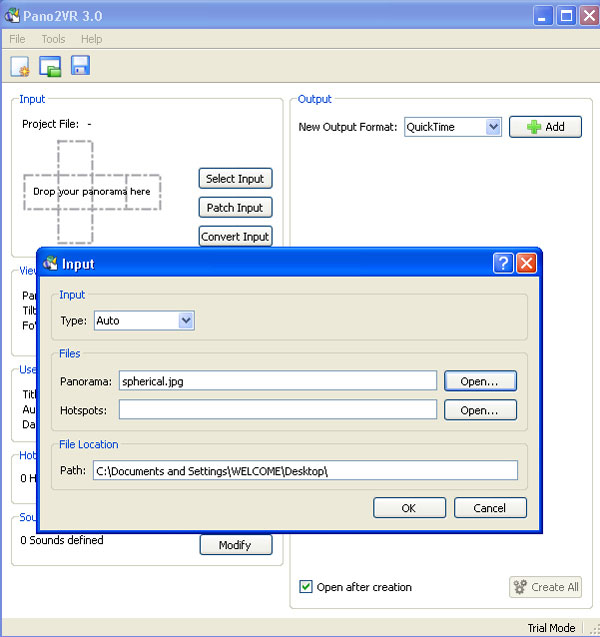
Step 2: Input
Type: Auto Panorama: Spherical
Browse the location of the rendered image in Vray SketchUp
 |
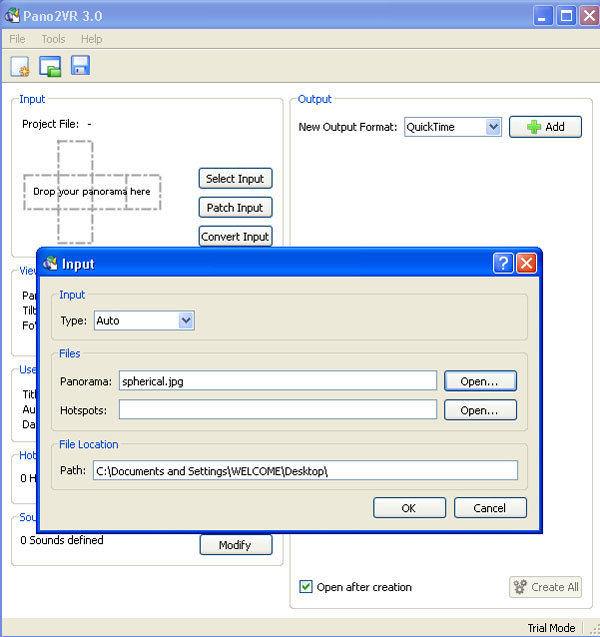
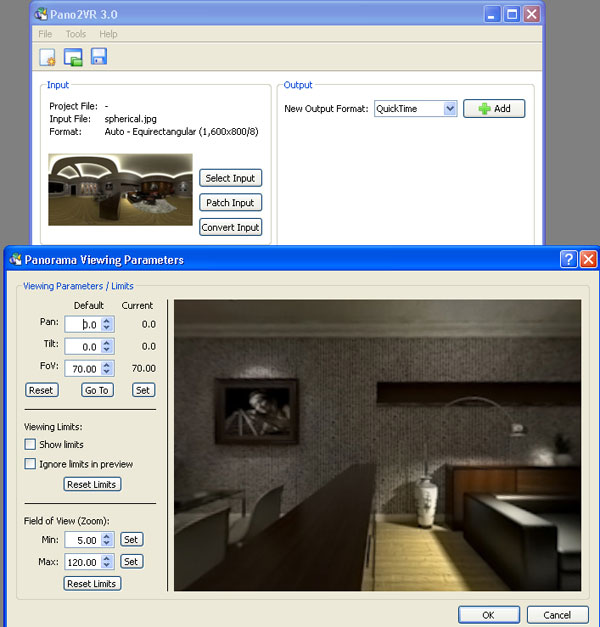
Step 3: Panorama Parameters
You can adjust the panorama parameters. In my case, I did not touch it.
 |
Step 4: Output
Enter your output. In my case I used quicktime
 |
That's it.
Here is my finish one using pano2Vray shareware program.
Some other workflow as follows:
Workflow 2: Using GoCubic
Workflow 3: Using Pano Press
Another cool way using using PanoPress. You have to have Wordpress install
- Download & unzip Panopress
- Upload Panopress to your wp-plugins folder
- Activate Panopress in your WordPress admin plugins page
- Configure Panopress settings in the admin page
- Optional: Upload your KRPano or Flash Panorama Player global swf file if you are using PanoPress with a global viewer for all panoramas on your site
- Upload your KRpano Pano2VR, or Flash Panorama Player panoramas to your site via ftp
- Enter the shortcode in your post
Workflow 4: Hosting your Pano to Pano sites
The easiest so far is using site to host your spherical panorama, like www.360cities.net, but I am not sure with this. I beleive that the one I did is in jeopardy of loosing the hosting, because it was not a real city nor a real environment. All you need to is to sign up and upload your image. Then you can choose what type you want. Here is the hosted image.
- Cover Story
-
 SketchUp Can Help You Win Interior..
 -
 Best Laptops for SketchUp
 -
 How to Resize Textures and Materials..
 -
 Discovering SketchUp 2020
 -
 Line Rendering with SketchUp and VRay
 -
 Pushing The Boundary with architectural
 -
 Trimble Visiting Professionals Program
 -
 Diagonal Tile Planning in SketchUp
 -
 Highlights of some amazing 3D Printed
 -
 Review of a new SketchUp Guide
- Sketchup Resources
-
 SKP for iphone/ipad
 -
 SKP for terrain modeling
 -
 Pool Water In Vray Sketchup
 -
 Rendering Optimization In Vray Sketchup
 -
 Background Modification In sketchup
 -
 Grass Making with sketchup fur plugin
 -
 Landscape designing in Sketchup
 -
 Apply styles with sketchup
 -
 Bedroom Making with sketchup
 -
 Review of Rendering Software
 -
 Enhancing rendering for 3d modeling
 -
 The combination of sketchup
 -
 Exterior Night Scene rendering with vray


