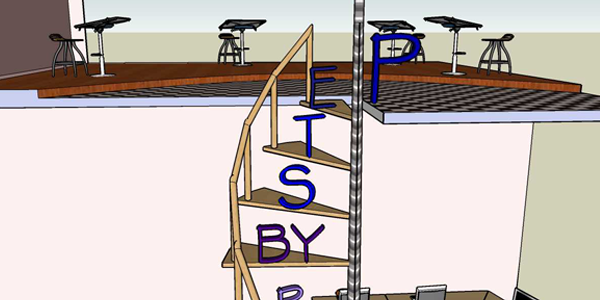
Recently I have been asked to submit a drawing for spiral staircases to be added to our new extension upper floor in the Landscape consultancy office. So that the designing studio upstairs could communicate easily with the plotting division downstairs.
Here is the quickness of SketchUp can be proven, so let’s dive directly into work.
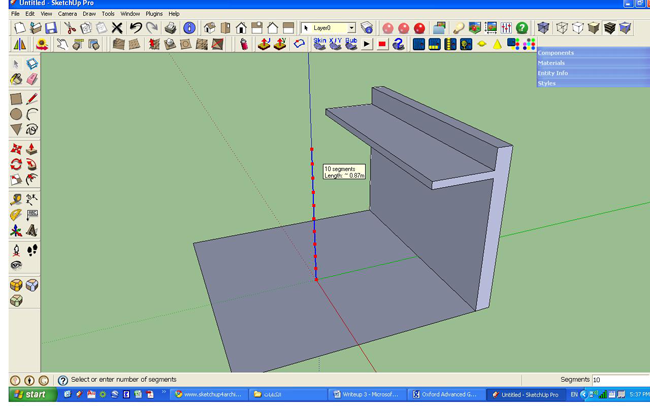
First step is to draw a line from the down floor to the upper floor; of course this line represents the vertical distance between the two floors, then right click on this line “edge” and select DIVIDE .
We will specify the number of the divided segments the way that matches the number of the stairs we need.
For example, if we need 10 steps so the divided segments must be 10 as well.
 |
Next step is to specify the width of the steps by drawing a circle begins from the endpoint of the vertical line and ends by about 90 cm radius or the equivalent in inches. Note that this circle must be drawn on the surface that represents the ground of the downstairs floor.
Then there is an important point we have to take care about, that we select the circle and right click to divide it also, but we have to make sure that the number of segments of the divided circle must match the number of stairs we need.
So if we decided that we need 10 stairs, we must divide the circle into 10 segments as well. But we don’t need the top stair neither the down stair so we must omit them then the circle division must be 8 segments.
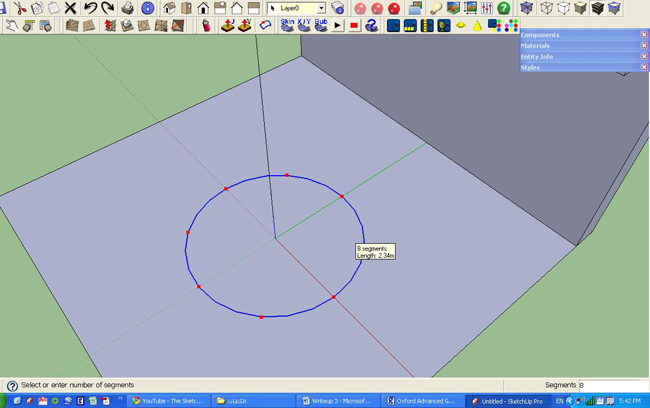 |
After dividing the circle we need to draw lines from the center of it to the end points of the 8 arcs of the divided circle to make it like the pie chart used in the statistics but all portion are equal.
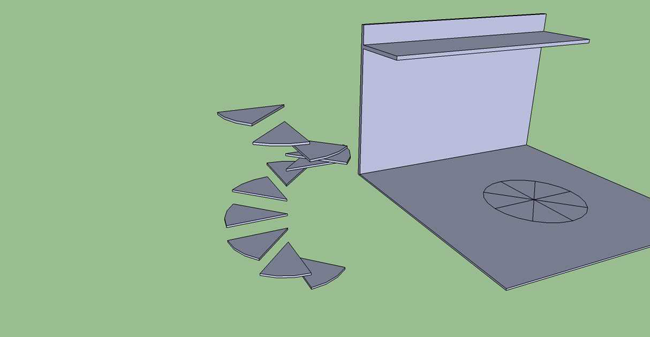
Third step is to use the push/pull tool to raise one of these portions to create the first step of the stairs, and then make it into a component. Select this component and use the rotate tool to make a circular array that begins from the first portion and ends to the last one.(to make a circular array copy the object by the rotate tool then type the number of copies then X)
All the previous work should be done in the surface that represents the ground floor of the room, after that select all these components and copy them again to the top of the vertical line we have done in the beginning then make Another array from the top to the bottom to get all the stairs that are possibly need for the spiral stairs.
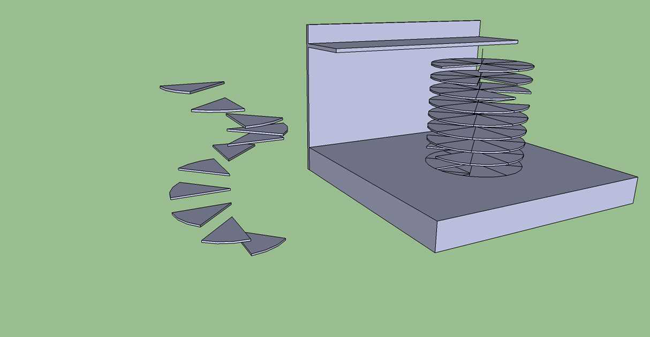 |
Finally, select the stairs successively by selecting the second step in the next raw components all around until the bottom of the stairs to get the spiral stairs and erase all the other unnecessary steps as shown in (image4).
 |
No need to tell to keep all these stairs in a group to deal with them easily, then move them to their right place in the model to connect the upper floor to the bottom one by the spiral stairs.
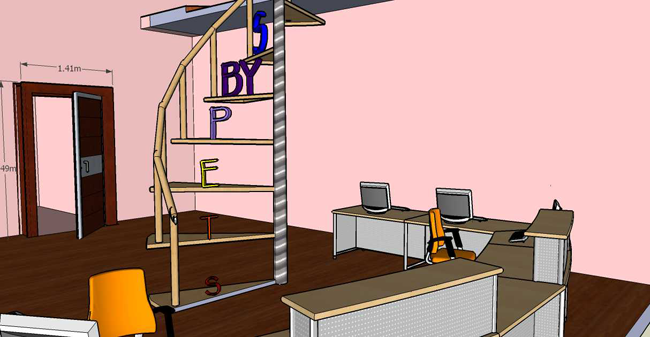
No you have all the stairs arranged in a component so you can deal with one of them separately by double click it to tell sketch up that you want to modify one component and apply the modifications to all the same components to make the rails of the spiral stairs, to get that final shape.
 |
- Cover Story
-
 SketchUp Can Help You Win Interior..
 -
 Best Laptops for SketchUp
 -
 How to Resize Textures and Materials..
 -
 Discovering SketchUp 2020
 -
 Line Rendering with SketchUp and VRay
 -
 Pushing The Boundary with architectural
 -
 Trimble Visiting Professionals Program
 -
 Diagonal Tile Planning in SketchUp
 -
 Highlights of some amazing 3D Printed
 -
 Review of a new SketchUp Guide
- Sketchup Resources
-
 SKP for iphone/ipad
 -
 SKP for terrain modeling
 -
 Pool Water In Vray Sketchup
 -
 Rendering Optimization In Vray Sketchup
 -
 Background Modification In sketchup
 -
 Grass Making with sketchup fur plugin
 -
 Landscape designing in Sketchup
 -
 Apply styles with sketchup
 -
 Bedroom Making with sketchup
 -
 Review of Rendering Software
 -
 Enhancing rendering for 3d modeling
 -
 The combination of sketchup
 -
 Exterior Night Scene rendering with vray


