
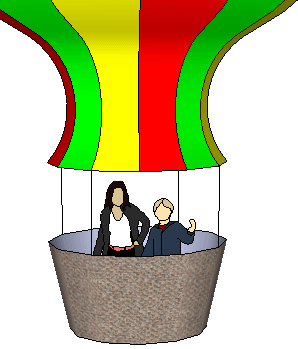
Hot Air Balloon in Google SketchUp
Bonnie Roskes
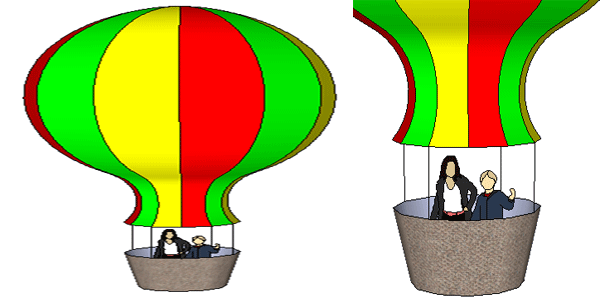
This neat little project uses a lot of SketchUp modeling tricks: making round objects, tapering sloped objects, and most importantly, unhiding edges.
This project will work in any version of SketchUp, including SketchUp 8.
For this project, it helps to have some basic knowledge of Google SketchUp (though detailed instructions are provided). In particular, it’s important to know how to zoom, rotate, and pan the view. If you need more information on how to get started, and a description of some basic tools, please read 3DVinci’s Getting Started Guide (PDF):
PC users: go to http://www.3dvinci.net/SketchUp_Intro_PC.pdf.
Mac users: go to http://www.3dvinci.net/SketchUp_Intro_MAC.pdf.
Step 1: The Balloon Shape
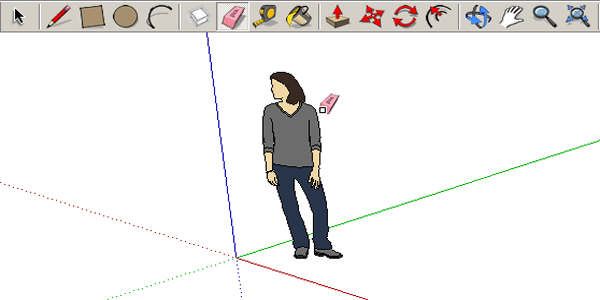
1. Open Google SketchUp. If your file contains a person standing on the ground near the origin, click the Eraser tool and erase him / her.
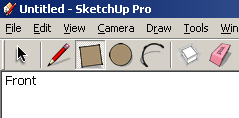
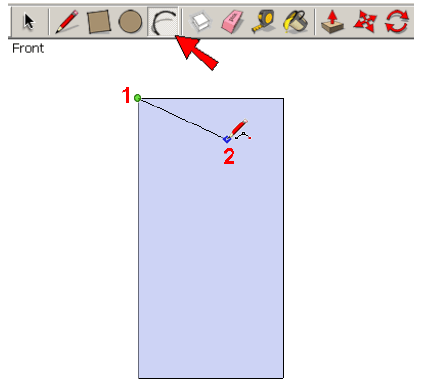
2. From the main menu, choose Camera / Standard Views / Front. The word “Front” should appear at the top left corner.
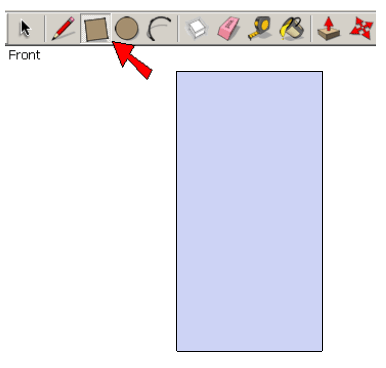
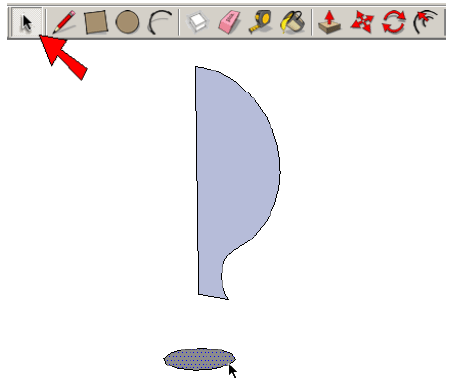
3. We’ll make half of the balloon’s cross-section, and “spin” that shape around to get the whole balloon. But first we’ll make a face on which we can draw the cross-section. Activate the Rectangle tool and draw a rectangle approximately like this:
We’ll now be drawing a series of arcs, which might take more than one try before you get yours exactly how you want them. So remember - Ctrl + Z (Cmd+Z on the Mac) can be used to undo step by step!
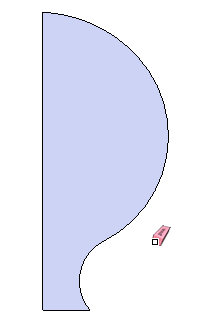
4. Activate the Arc tool. An arc is created with three clicks: start point, end point, and “bulge” point. So click Point 1 at the top left corner of the rectangle, then click Point 2 approximately where shown.
5. Move the cursor up slightly, and click the third point so that the arc is almost horizontal at its left endpoint.
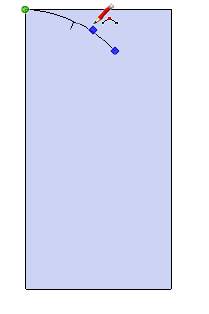
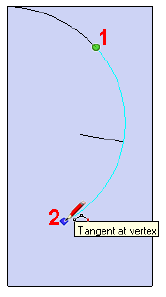
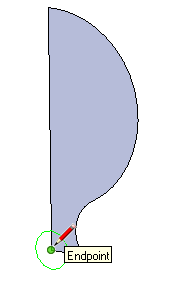
6. Start the next arc where the previous one ended (Point 1 below). Then move your cursor around where Point 2 is shown below. The new arc should appear in light blue, which means it is tangent to the previous arc.Double-click this second point, to complete this arc.
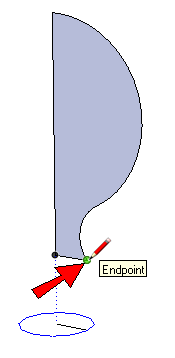
7. Make another arc or two so that your curves resemble what’s shown below. (It doesn’t have to be exact, of course, and you might have to undo and redo a few attempts).
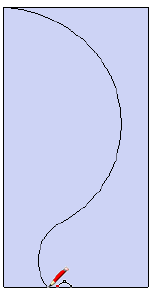
8. Activate the Eraser and trim all parts of the rectangle so that only the cross-section face remains.
9. To make this cross-section into a round 3D object, we need a circle. So activate the Circle tool, and before clicking anywhere look at the Sides field in the lower right corner. This number is 24 by default, but for our balloon a smaller number of sides would be better (you’ll see why later). Type 12 (don’t click in the Sides field; just type and the number will appear there), and press Enter.

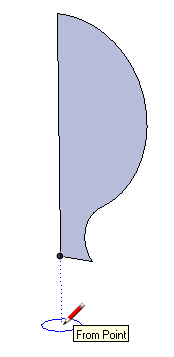
10. Hover your cursor (don’t click yet) over the lower left corner point of the cross-section face.
11. Orbit so that the cross-section face turns to the right or left, and move the cursor straight down, following the blue direction. The circle color should now also be blue. Click to place the circle approximately where shown.
12. The next click determines the radius of the circle. This circle will be used later to create the balloon’s basket, so we don’t want it too large or too small. To get it the size just right, click the corner point shown below:
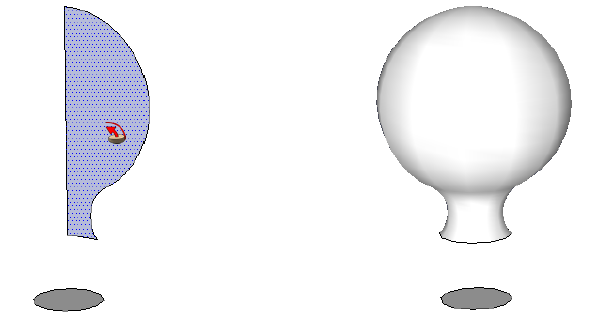
13. Now activate the Select tool and click the circle you just drew, either on its face or edge.
14. From the main menu, choose Tools / Follow Me. Click the cross-section face, and it spins around the circle to complete the balloon shape.
Step 2: Stripes
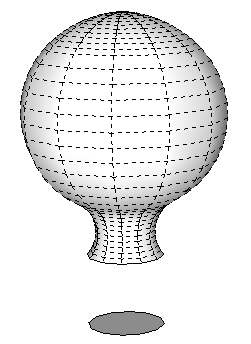
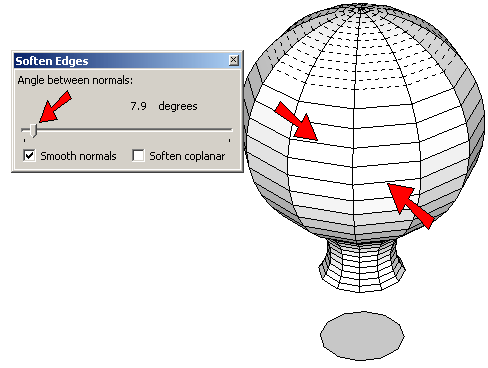
1. Creating the faces for stripes involves a neat trick of unhiding edges that are currently hidden. To see these hidden edges, choose View / Hidden Geometry. The hidden edges are all shown as dashed lines. We want the vertical edges to become “real” edges, but horizontal edges should remain hidden. If you spin around the balloon and count, you’ll see 12 vertical “stripes” around the balloon. This is because the circle we used for Follow Me had 12 sides; if we used a 24-sided circle there would be twice as many stripes.
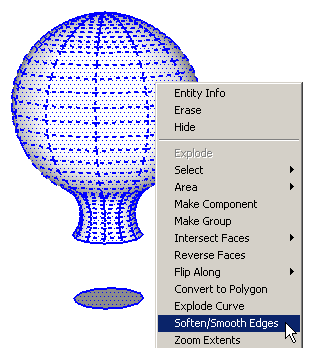
2. Select everything (use the Select tool and drag a window around the entire balloon, or just press Ctrl + A or Cmd +A). Then right-click on any selected face or edge and choose Soften / Smooth Edges.
3. This step involves some fine-tuning with the angle slider on the Soften Edges window. (It doesn’t matter what you do with the two checkboxes.) If you go to low with the slider, some of the horizontal edges will beunhidden (solid lines) . . .
4. . . . but going too high leaves hidden some of the small vertical edges at the top of the balloon. You’re not going to be able to unhide all of these edges at the top, so stop the slider when all horizontal edges, and only a few vertical ones, are dashed.
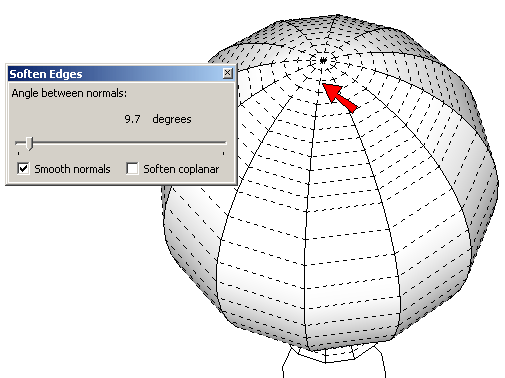
You should have something like this at the top of your balloon - three or four short, dashed segments alongevery radial set of edges.
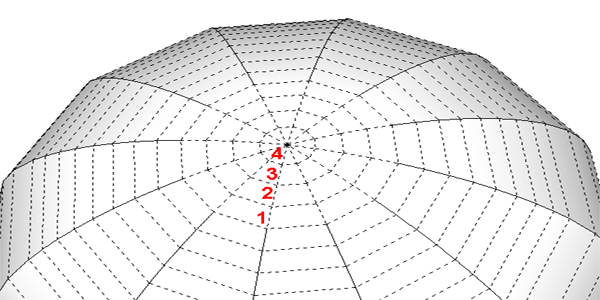
5. The only way to “fix” these edges is to trace them manually. Use the Line tool for this, and click-and-drag a line along each dashed segment, from one endpoint to the other.

If you’re good at using the Rotate tool to make rotated copies, you can save yourself a lot of tedious tracing work. Select the three or four lines you want to copy, activate Rotate, and place the protractor at the top of the balloon, making sure it is oriented in the blue direction (you can use the Shift key to “lock” the protractor’s orientation). Make one 30-degree copy, then enter 11x to create 11 more copies.
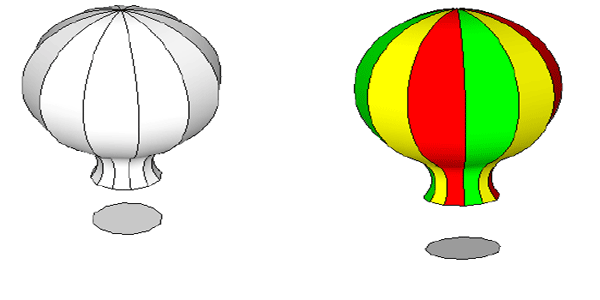
6. Choose View / Hidden Geometry to toggle the hidden edges off. Paint yours 12 stripes however you like: 12 different colors, two sets of six colors, three sets of four colors, etc.
Step 3: Finishing Touches
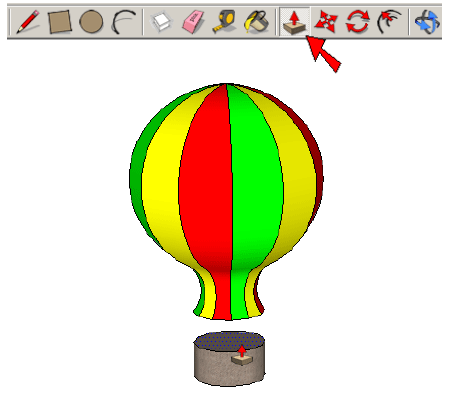
1. For the basket, use Push/Pull to pull the circle up or down.
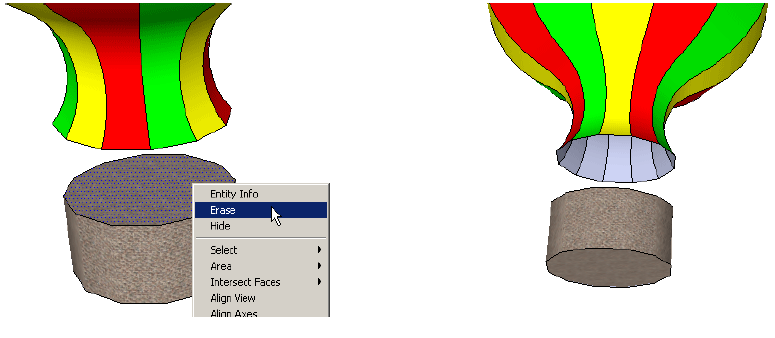
2. To remove the top of the basket, right-click on the face and choose Erase. Do the same to remove the bottom face of the balloon itself.
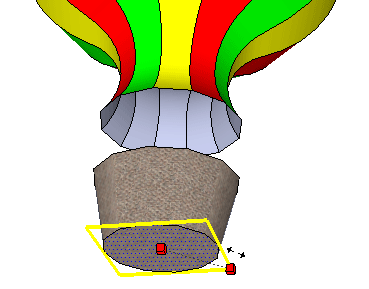
3. To taper the basket, select its bottom face and activate the Scale tool (menu: Tools / Scale or press the S key). Press and hold the Ctrl key (PC) or Option key (Mac) and drag a corner point slightly inward.
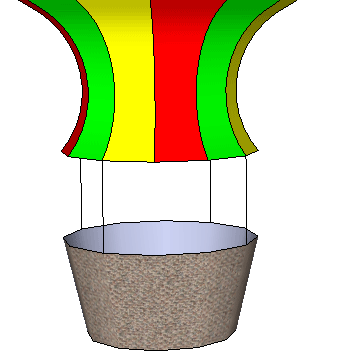
4. For the ropes connecting the balloon to the basket, draw a few vertical lines.
5. And if you want to add some passengers, use the Get Models tool and search the 3D Warehouse for some 2D people. (Or 3D people, or animals, or whomever you want to give a ride.)
If you try this project with your children or students, and have a nice balloon model you’d like to share, please let me know! I will be happy to blog about it, and maybe feature your models in a future newsletter. Contact me at bonnie@3dvinci.net. Thanks!
If you enjoy stripes and patterns, you’ll love 3DVinci’s Crazy Shapes, part of our ModelMetricks AdvancedSeries.

- Sponsored Plugins


- Sponsored Plugins

- Cover Story
-
 SketchUp Can Help You Win Interior..
 -
Best Laptops for SketchUp
-
How to Resize Textures and Materials..
-
Discovering SketchUp 2020
-
Line Rendering with SketchUp and VRay
-
Pushing The Boundary with architectural
-
Trimble Visiting Professionals Program
-
Diagonal Tile Planning in SketchUp
-
Highlights of some amazing 3D Printed
-
Review of a new SketchUp Guide
- Sketchup Resources
-
SKP for iphone/ipad
-
SKP for terrain modeling
-
Pool Water In Vray Sketchup
-
Rendering Optimization In Vray Sketchup
-
Background Modification In sketchup
-
Grass Making with sketchup fur plugin
-
Landscape designing in Sketchup
-
Apply styles with sketchup
-
Bedroom Making with sketchup
-
Review of Rendering Software
-
Enhancing rendering for 3d modeling
-
The combination of sketchup
-
Exterior Night Scene rendering with vray