
Quick Digital Watercolor from Google SketchUp
Jim Leggitt
I have been recently investigating how to create fantastic hybrid watercolors (combining traditional hand drawing with digital imaging) and decided to apply my process to a recent project. This digital watercoloring technique simply involves building a Google SketchUp model, hand coloring over a print with markers and colored pencils, then applying the watercolor filter to the image in Adobe Photoshop. It’s that simple! Start to finish, I took less than 8 hours to build the model and complete the digital watercolor. Here is my “step-by-step” explanation of this exciting hybrid visualization method.
Thumbnail Concept Sketch
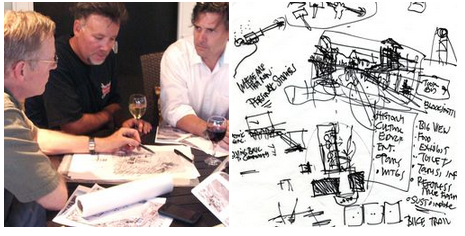
I began with an idea, some tracing paper, fellow designers (some wine) and sketched out an idea for what a small visitors center might look like adjacent to an existing two story house.
SketchUp Model
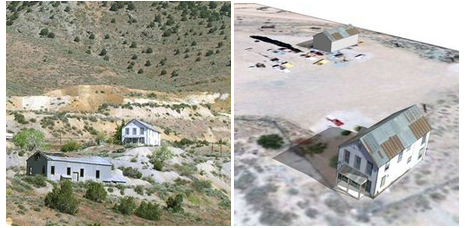
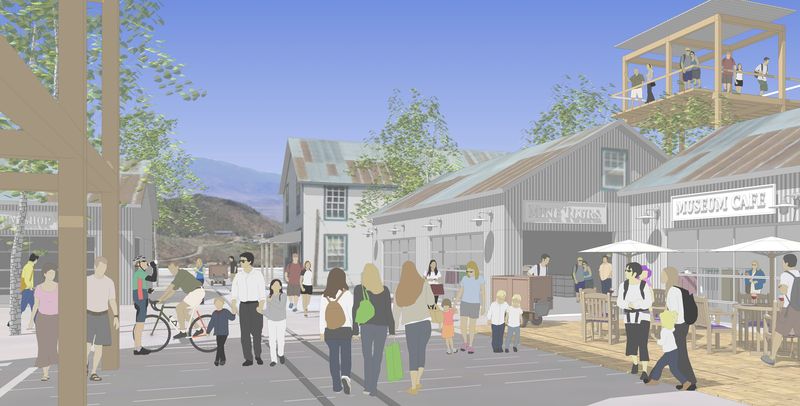
I was able to combine some existing site photographs and a satellite image from Google Earth to quickly build a 3D model of the existing site.
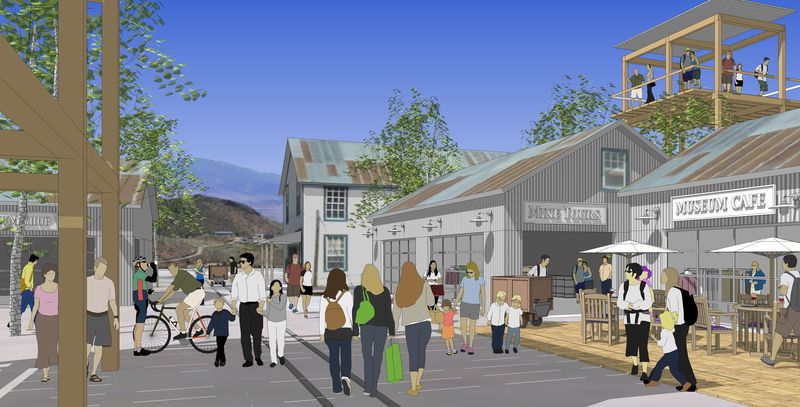
Adding a photograph in the background of the existing site view, I built a semi-detailed SketchUp model showing the two-story house with a cluster of adjacent museum buildings, outdoor exhibits and observation tower. The entire model took about 4 hours to build.
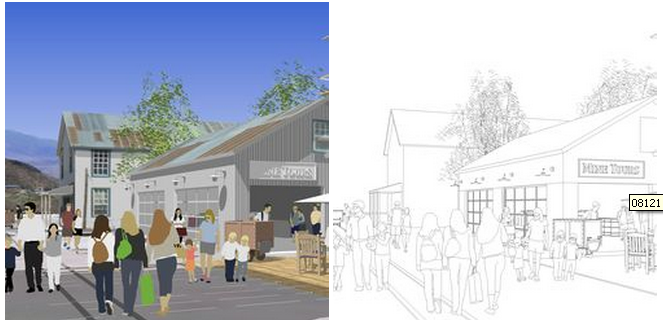
To prepare the scene for my hybrid watercolor process, I exported the image without the edges (left) and with the edges only (right) in order to recombine them in Photoshop are different levels of transparency.
Final SketchUp Print. Notice how light and faded this image looks. In order to add back color with markers, I needed to lighten the image and linework. Using layers in Adobe Photoshop, I gave the basic image layer a 75% transparency and the edges layer a 50% transparency. This “fading” of the image was critical to the success of the digital watercolor method! All images were 300dpi by 17 inches wide.
Hand Coloring with Markers and Pencils
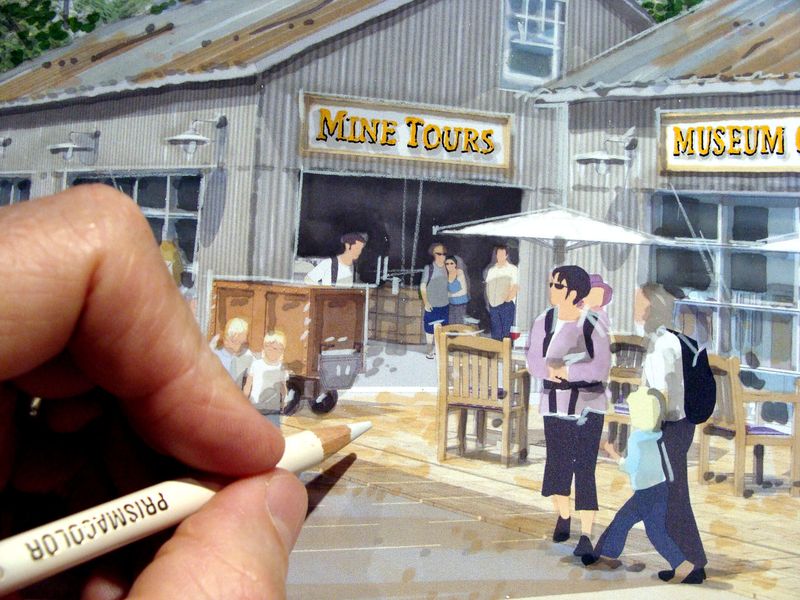
I completely colored the print using very light colored Chartpak AD markers, dabbing the markers and overlapping the marker lines in order to give it an informal appearance. I highlighted top edges of window mullions, furniture, people and roofs with a white Prismacolor pencil. The colored 11x17" print was scanned at 300dpi as a jpeg.
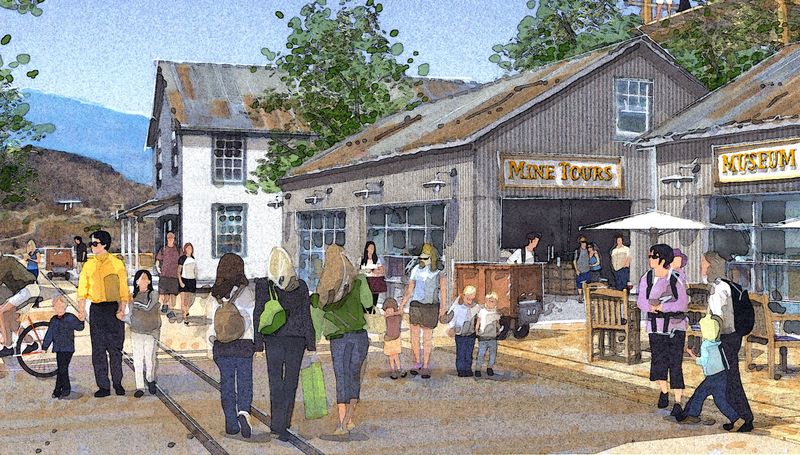
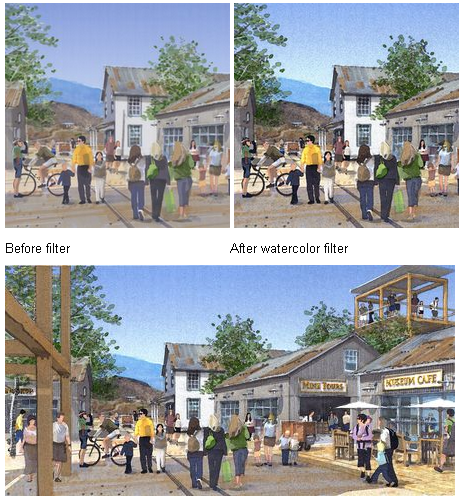
Photoshop Watercolor Filter
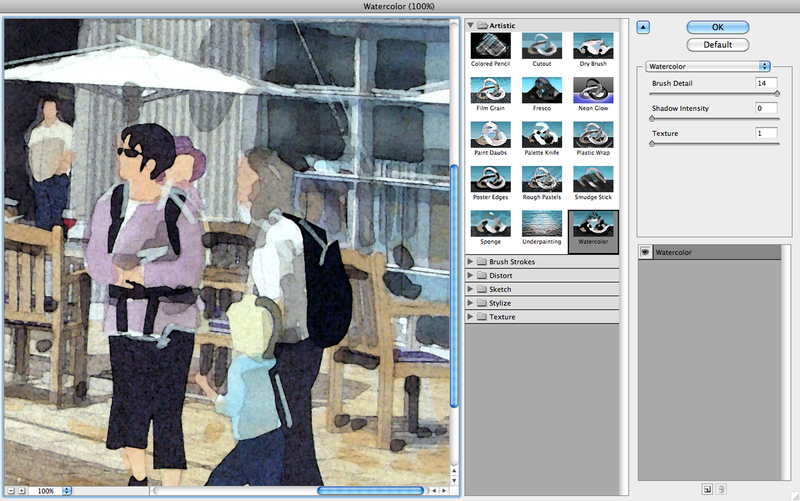
I applied the watercolor filter to the image using the settings Brush Detail 14, Shadow Intensity 0 and Texture 1. The level of filtering was sufficient after the first round but I chose to filter it a second time and was much more satisfied with the effect. After the water coloring filter was applied, I adjusted the contrast levels of the image to deepen the blacks and lighten the whites.
To summarize the process, 1) export your SketchUp model view as different layers that are recombined in Photoshop, lightened and printed on 11x17” paper, 2) hand color the print with markers and pencils using an informal casual technique and 3) scan the colored print and modify the image in Photoshop using the watercolor filter.
Cross Posted from Jim Leggitt's BLOG

- Sponsored Plugins


- Sponsored Plugins

- Cover Story
-
 SketchUp Can Help You Win Interior..
 -
Best Laptops for SketchUp
-
How to Resize Textures and Materials..
-
Discovering SketchUp 2020
-
Line Rendering with SketchUp and VRay
-
Pushing The Boundary with architectural
-
Trimble Visiting Professionals Program
-
Diagonal Tile Planning in SketchUp
-
Highlights of some amazing 3D Printed
-
Review of a new SketchUp Guide
- Sketchup Resources
-
SKP for iphone/ipad
-
SKP for terrain modeling
-
Pool Water In Vray Sketchup
-
Rendering Optimization In Vray Sketchup
-
Background Modification In sketchup
-
Grass Making with sketchup fur plugin
-
Landscape designing in Sketchup
-
Apply styles with sketchup
-
Bedroom Making with sketchup
-
Review of Rendering Software
-
Enhancing rendering for 3d modeling
-
The combination of sketchup
-
Exterior Night Scene rendering with vray