In order to digitally sketch any floor plan with sketchup, one should abide by the following procedures:-
Download and set up sketchup. After opening sketchup, opt for Plan View - Feet and Inches to assign the styles to drawing.
After that, visit View ---> Tool Palettes ---> Large Tool Set to avail all the toolset.
It is suggested that you should sketch the floorplan on the basis of a rough hand-sketch of your space and measurements of the length of all the walls. Ensure the position of your doorways as well as the lengths of all the walls. While gauging a whole apartment, you don’t have to contain wall thicknesses and other complicated details.
The following toolset are useful to draw any digital floor plan with sketchup :-
Orbit: Select this tool and then pull the cursor in the drawing area to rotate in 3D.
Zoom: Select this tool and then drag your cursor to position your view nearer to or further away from the drawing space.
Pan: Select this icon and then pull the cursor across the screen to shift to other areas of the drawing space.
Quadrant: In order to generate a floor plan, utilize the quadrant located at upper right corner of the drawing space. Pan to fill up the screen. In this quadratic plane area there are coordinates having positive numbers. For sketching perfect lines, just start the lower-left corner of your drawing where the axes meet at (0,0).

Image Courtesy: apartmenttherapy.com
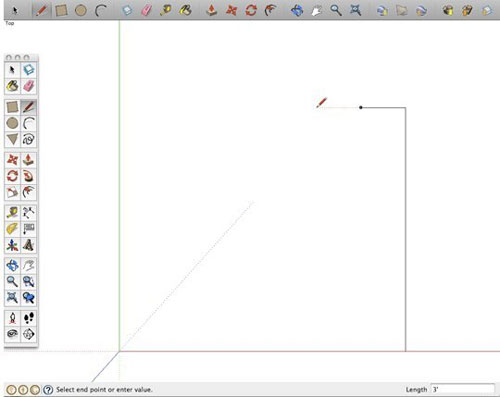
Line: In order to turn on the line tool, just click on the pencil tool. To sketch a line, click anywhere (at the origin). Then, shift the cursor equivalent to the X or Y axis. Put the desirable length of the line with keyboard (i.e. 10' 4 3/16"), and press enter. A line of the desirable length will be formed and the cursor will be set to the new endpoint. Apply identical procedure again to generate another line that starts with the endpoint of the first line.
Erase: In order to sketch doorways, just draw them with their individual lines with endpoints. After the drawing is completed, return back and remove the doorway segments to indicate that there exists passage in those areas. Use the erase tool, then select the part to be deleted.
Tips and Tricks: The program will help to notify you when you've come to the endpoint of another line. While sketching connected lines, ensure that you select only on these called-out green endpoints once the program "snaps to" them. The midpoint of a line can be detected by hovering across that fairly accurate location and look for a blue dot coming out on your screen.

Image Courtesy: apartmenttherapy.com
For any error, at the time of sketching the figure, you should not start afresh from the beginning. Visit Edit ---> Undo Draw Line to back off a step. Now, just click on the preferred point from where the drawing will be started again.
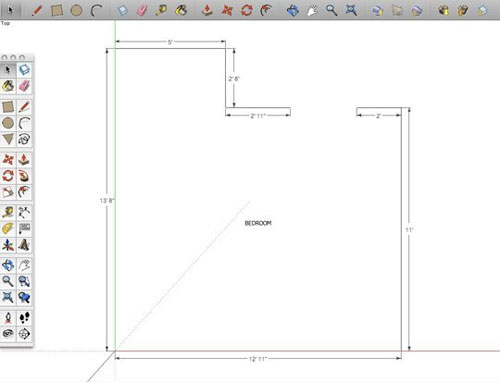
Dimension: The dimensioning tool can be applied to mark the lengths of the lines already sketched. Click on either edge, or the two endpoints of a line, then drag the cursor exterior area. The dimension line will pass through as far as it is arranged on the position selected by you. Click to save.
Text: Select the text tool, then click anywhere on the page to position your text for writing. A box will be visible where you can start typing. This process is useful to label the rooms shown in the floor plan.
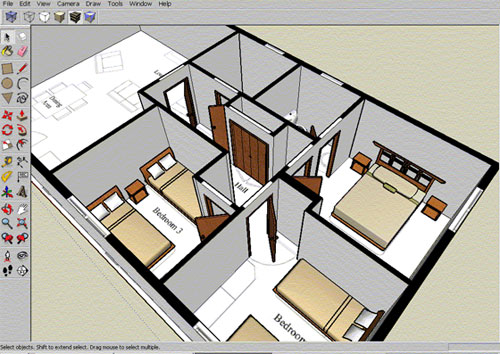
Save: After completing all the processes, go to File ---> Export ---> 2D Graphic to save the plan as a regular image file that can be used in Photoshop.

Image Courtesy: woodworkingpdf.co
- Cover Story
-
 SketchUp Can Help You Win Interior..
 -
 Best Laptops for SketchUp
 -
 How to Resize Textures and Materials..
 -
 Discovering SketchUp 2020
 -
 Line Rendering with SketchUp and VRay
 -
 Pushing The Boundary with architectural
 -
 Trimble Visiting Professionals Program
 -
 Diagonal Tile Planning in SketchUp
 -
 Highlights of some amazing 3D Printed
 -
 Review of a new SketchUp Guide
- Sketchup Resources
-
 SKP for iphone/ipad
 -
 SKP for terrain modeling
 -
 Pool Water In Vray Sketchup
 -
 Rendering Optimization In Vray Sketchup
 -
 Background Modification In sketchup
 -
 Grass Making with sketchup fur plugin
 -
 Landscape designing in Sketchup
 -
 Apply styles with sketchup
 -
 Bedroom Making with sketchup
 -
 Review of Rendering Software
 -
 Enhancing rendering for 3d modeling
 -
 The combination of sketchup
 -
 Exterior Night Scene rendering with vray


