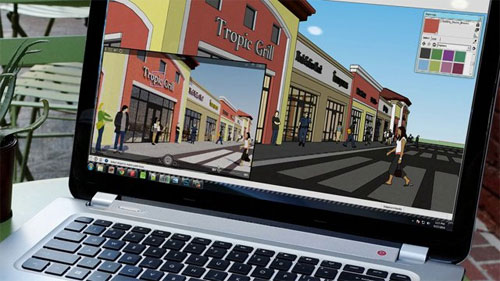
The visualizer is an awesome tool for creation of clear, realistic images rapidly for communication with clients, contractors, and colleagues.
The image has the capability of thousand words to express in one moment. The picture says it all.
Sometimes a photo can show what a formal drawing cannot. How can we further maximize the utility and impact of our designs?
The designers must have noticed that the unshadowed-SketchUp-display had one thing that the Visualizer display does not have, that is dimension markings.
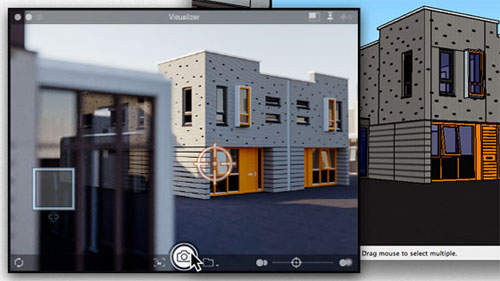
This post will show you how to quickly integrate both views together, so that you can get the best of both worlds when you need it. Here is an example:
Pixel-Perfect - To make a photo like this we just require applying a new subtle characteristic of Visualizer 1.1's new image size tool : Pixel-Perfect Alignment.
In Visualizer's window size controls, the top button sports a tiny SketchUp logo. When you click it, Visualizer's window will alter its proportions to match that of the SketchUp display. And if you hold down the shift key when selecting it, Visualizer will also match the SketchUp display size exactly : pixel-for-pixel.

If we save the Visualizer photo and also use SketchUp's own "Export 2D Graphic" ability, these two pictures will align perfectly and can easily be mixed to gain the combined strength of both views in a single photo.
Step-by-Step: If the designers are skilled with mixing SketchUp with picture tools like Gimp or Photoshop, you may already know everything you need already. For the rest of us, here is a quick systematic breakdown:
- For Visualizer, designers know what their need to know: shift-click the window size to get perfect alignment with SketchUp, and then press the shutter button to save that image when you are satisfied with the detail and color.
- In SketchUp, the designers need to tweak our display so that only the dimensions guides are shown. This is surprisingly easy!
Firstly, turn off SketchUp shadows.
Then, open the SketchUp "Styles" window from the "Window" menu, and follow along with these three step.
- To finish this up, we will need to combine them in an common image-editing program like Gimp or Photoshop. We will use Gimp in the example since it's free for anyone - the steps are nearly identical in Photoshop.
- simply combine the pictures as two layers. In Gimp we can get them both in a single step, using "File->Open As Layers..." and select both images before pressing the "Open" button.
- Open the "Layers" window, and you'll see your two layers. If the dimensions layer is not visible, just drag-rearrange them so that the dimensions are on top (red star in the illustration)
- Select that dimensions layer and change the Mode from "Normal" to "Multiply" (marked by the green star). Voila! Our dimensions are layered over the Visualized house.
- The dimensions will be in black. If you'd like a lighter touch, you can also edit the opacity of the top layer, as we did in our example picture at the beginning of this post (blue star).

- Cover Story
-
 SketchUp Can Help You Win Interior..
 -
 Best Laptops for SketchUp
 -
 How to Resize Textures and Materials..
 -
 Discovering SketchUp 2020
 -
 Line Rendering with SketchUp and VRay
 -
 Pushing The Boundary with architectural
 -
 Trimble Visiting Professionals Program
 -
 Diagonal Tile Planning in SketchUp
 -
 Highlights of some amazing 3D Printed
 -
 Review of a new SketchUp Guide
- Sketchup Resources
-
 SKP for iphone/ipad
 -
 SKP for terrain modeling
 -
 Pool Water In Vray Sketchup
 -
 Rendering Optimization In Vray Sketchup
 -
 Background Modification In sketchup
 -
 Grass Making with sketchup fur plugin
 -
 Landscape designing in Sketchup
 -
 Apply styles with sketchup
 -
 Bedroom Making with sketchup
 -
 Review of Rendering Software
 -
 Enhancing rendering for 3d modeling
 -
 The combination of sketchup
 -
 Exterior Night Scene rendering with vray


