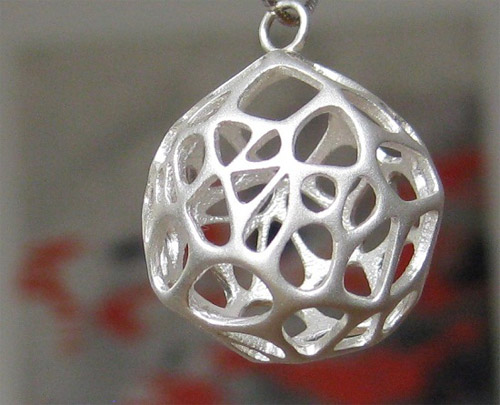
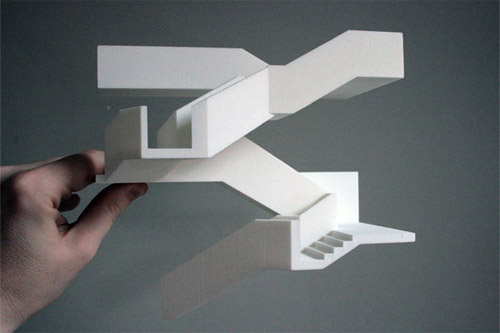
A polyamide is a macromolecule with repeating units linked by amide bonds. They can occur both naturally and artificially. Examples of naturally occurring polyamides are proteins, such as wool and silk. Polymide is considered the best material for 3D modeling. In addition, it is not new to us that SketchUp is the best programme for creating 3D Model. If designers want to create model they should know some basic learnings with polymide 3D modelling.

Wall thickness: In 3D printing, wall thickness refers to the distance between one surface of your model and the opposite sheer surface. Wall thickness can provide you either with a strong solid surface, or with a flexible and expandable surface. A good example of creating thin surface walls is when designing a spiral that needs some suspension properties. This makes your design light and flexible. The opposite effect can be achieved when making your surface walls thicker. This would be ideal for a more solid spiral inspired flower vase.
Hollow out your model: Whenever it is possible, we advise you to hollow out your model. This avoids deformation and discoloration during the printing process. You can either hollow out your model or keep the polyamide powder trapped inside the model. Alternatively, you can design a strategically placed hole (two is better) so the powder can be removed after printing.
Big flat plains can cause warping: Designing a big flat plain the size of an A4 page size is a bad idea. In most cases, your model will deform. This process is called ‘warping’. Even creating support ribs under your plain does not solve problem. On the contrary, it increases the chance of deformation even more. The key is to avoid big flat plains.
The right space between your (moving) parts: When you want to design something like a pearl necklace or a chainmail necklace, the spacing between your surfaces is crucial. It will determine the flexibility/bendability of your design. We advise you to keep a minimum space of 0.4mm between designed surfaces. However, the more space you can afford the better. The more complex your design is, the more complicated it becomes for the powder to exit the empty spaces. Try to think of how the powder will flow through the spaces of your 3D printed design.
When you design something like chainmail, make sure you provide enough space between the rings in your 3D model. It allows the powder between the rings to flow away when the model is taken out of the 3D printer. At least, 0.4 mm of space should be kept between the rings, it can always be more. The space you create between your rings will purely depend on their size. For big rings, you can create a lot of space so you can print more of them in a confined space. For small rings, you will have to limit your space to keep a distance between the opposite horizontal or vertical ring in the chain.
Using surface textures to hide building layers: Due to the building process of layered manufacturing, it often creates a visible layer-based surface on your designs. To remove the visible building layers, models are often polished. However, by applying a surface texture on your model, you can take advantage of the unsmooth surfaces and get rid of the building layers on your surfaces.

Assembly
When designing models that need to be assembled, it is important to provide enough distance between the parts that will be assembled. A perfect fit in your software package does not mean a perfect fit after printing because your software ignores the friction present in the real world. Therefore, always leave at least 0.6 mm distance between the different parts.
Embossed and engraved details
For engraved text or details in the surface, we recommend letters with a minimum line thickness of 0.8 mm and a depth of 0.8 mm and an overall height of 3 mm or more. Embossed text or details on the surface should be thick enough in order not to break during production and transport. We recommend letters that have a line thickness of at least 0.8 mm, and an overall height of 3 mm or more. The depth should be at least 0.8 mm.
However, the designers have to concentrate more on polished models
Our advice is for the designers to go beyond painting your model and discovers a special finishing option that not only changes the way the model looks, but also how it feels. When adding a velvet finish to your models, a suitable adhesive is applied to the surface. Then, fabric fiber is applied, penetrating the surface of the adhesive to create the desired velvet finish.
Velvet
The process of adding a velvet finish to your models is called flocking and is done making use of an electrostatic flock applicator. First, a suitable adhesive is applied to the surface. Then a metal pin is attached to your model so it can be earthed. In a flocking machinethe "flock" is given a negative charge so that the flock material flies vertically onto the substrate attaching to previously applied glue.Your model will always be marked somewhere because of the need for the earthed pin to be inserted. So we advise you to foresee a hole of 1.6 mm in diameter with a minimal depth of 2 mm for pins at place where it isn’t visible as such (e.g. bottom).
Sharp corners and details
Since the velvet finish is added to your original design, you’ll notice that the details of your model will appear less crisp.Due to the fact that we have to spray the adhesive on to the model, less accessible areas can’t be sprayed on that well. This will cause your model to be less covered at those areas. Try to avoid the areas like sharp corners or the insides of a model (e.g. a vase). Very thin parts are also more difficult to be cover due to limited space where the flocks can be attached. Very thin details, articulated edges as well as thin wire frame are very hard to cover.
- Cover Story
-
 SketchUp Can Help You Win Interior..
 -
 Best Laptops for SketchUp
 -
 How to Resize Textures and Materials..
 -
 Discovering SketchUp 2020
 -
 Line Rendering with SketchUp and VRay
 -
 Pushing The Boundary with architectural
 -
 Trimble Visiting Professionals Program
 -
 Diagonal Tile Planning in SketchUp
 -
 Highlights of some amazing 3D Printed
 -
 Review of a new SketchUp Guide
- Sketchup Resources
-
 SKP for iphone/ipad
 -
 SKP for terrain modeling
 -
 Pool Water In Vray Sketchup
 -
 Rendering Optimization In Vray Sketchup
 -
 Background Modification In sketchup
 -
 Grass Making with sketchup fur plugin
 -
 Landscape designing in Sketchup
 -
 Apply styles with sketchup
 -
 Bedroom Making with sketchup
 -
 Review of Rendering Software
 -
 Enhancing rendering for 3d modeling
 -
 The combination of sketchup
 -
 Exterior Night Scene rendering with vray


