Author : Frank Fheitzma
SketchUp basics - Frank Fheitzma
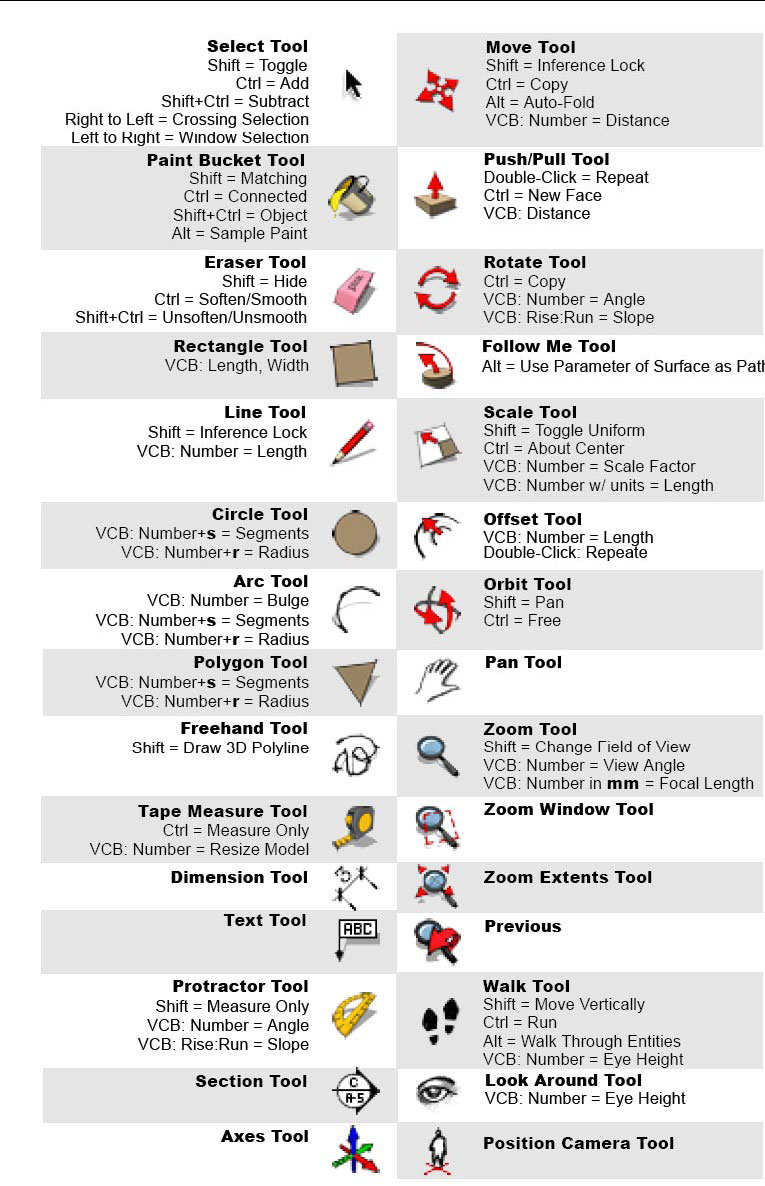
Below is an explanation of the tools:
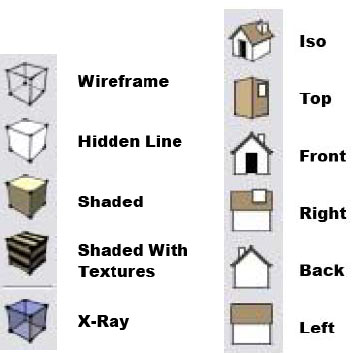
30. Shading and view commands:
31. SketchUp and Google earth
You can place a SketchUp model anywhere on the earth using Google Earth. Here is how:
Open SketchUp
Draw a model in SketchUp
Import the site from Google Maps by selecting the icon in the SketchUp menu bar with the yellow arrow pointing down.

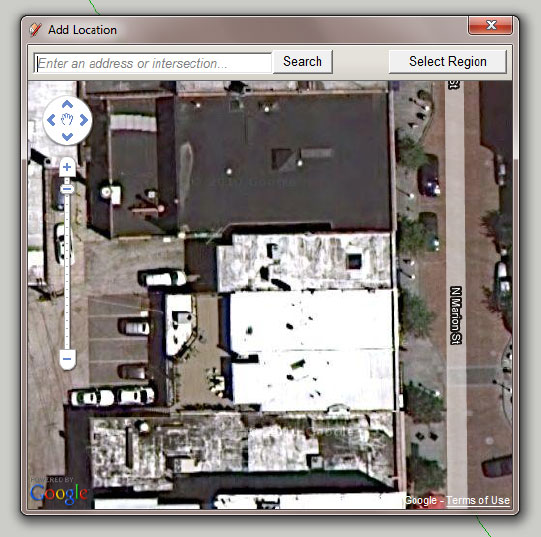
An "Add Location" Dialogue box will appear:
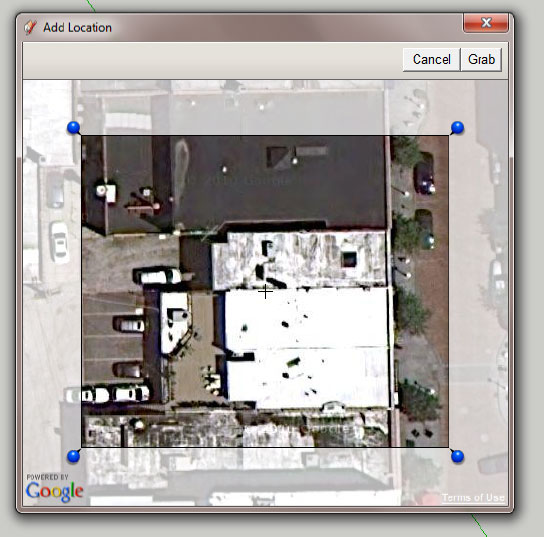
Type in the address of the location you want, and then click on "Select Region" button. You can then adjust the pins at the corners and, then select the "Grab" button.
If you don't like the background, click on it so the border turns red, then right click and select "unlock" from the context cursor menu. The border will then turn blue. Now select the delete key on the keyboard.
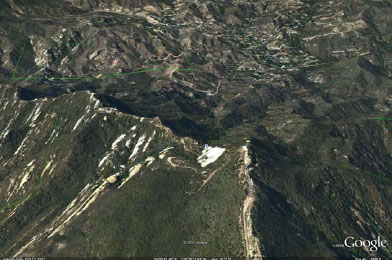
Here is the original 3d image in Google Earth:
Below is the image SketchUp after importing the Google Earth site to SketchUp:
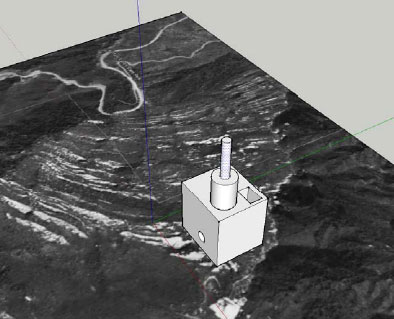
You can move, rotate or scale your drawing on the Google Maps background, but you will not be able to change the background. After you have the building where you want it, and want to see how it will look in Google Earth in 3d, export it along with the site to Google Earth by selecting the "Place Model" icon in the SketchUp menu bar with the orange arrow pointing up.

Now here is how your "placed" model will look in 3d in Google Earth:
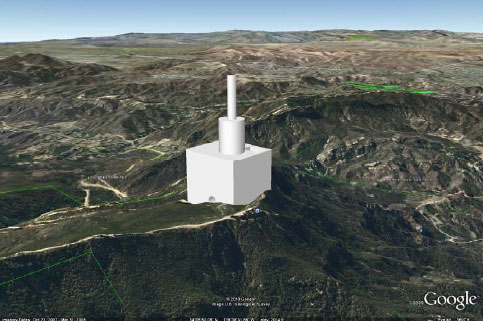
Note that you can continue to make changes to the model in SketchUp and then use "Place Model" again to update it.

Answer "Yes" to update the image in Google Earth.
Note that you cannot cast shadows in Google Earth.
32. SketchUP animations and Power Point
- Open SketchUp and make a drawing
- Create Scenes in SketchUp by selecting View>Animation>Add Scene
- Zoom, move viewpoint, add color, change time of day or add to model in some other way and add another scene.
- After you have added all the scenes you want for your animation, select
- File>Export>Animation. Give it a name and a path to save. It will save your file as an .avi file.
- Open Power Point and make a new show.
- Click on the Insert tab>Movie. Browse to the avi file you just created and select it. In the Microsoft Office Power Point dialogue box that pops up "How do you want the movie to start in the slide show," select the button "Automatically."
Frequently Asked Questions
Question 1: Why is my model being clipped and sliced as I rotate or zoom in?
- This is a known glitch in the software called Camera Clipping Plane. First, don't worry; although it can be distracting, this doesn't cause any actual damage to your model.
- There are several situations in which you might encounter this:
- One is when the field of view (FOV) is set very wide. You can adjust the FOV between 1 and 120 degrees (the default is 35 degrees in Google). It's easy to unintentionally change the FOV by pressing the Shift key while you are zooming in or out using the Zoom tool.
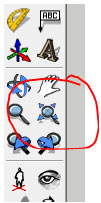
- Another situation that can cause clipping is when the Perspective camera mode is turned off. In that case, click the "Zoom Extents" button (it looks like a magnifying glass with four red arrows pointing outward). The camera zooms out to display the entire model, and the clipping is eliminated.
- A third situation is when the scale of your model is very small or very large. In this case, you can change the scale of your model.
- This can also happen if your model is very far away from the origin point (the point where the red, green, and blue axes intersect). In that case, you can move your model closer to the origin point. To do this: select all of the geometry in your model, use the Move tool to grab a corner point of the selected geometry that is on the ground plane, start to move the selected geometry, and then type "[0,0,0]" (including the square brackets) in the "Value Control Box" (which is in the lowerright corner of the SketchUp window). This causes the selected point to be moved to the origin point.
- I have found that the easiest way to fix it is to simply Zoom Extents (Camera, Zoom-Extents, or Ctrl-Shift-E)
Question 2: How do I Change the scale of an entire model?
- If you have drawn a model composed of many entities, for example, an entire house made of many edges, faces, and other entities, and then want to change the scale of the entire model, there's an easy way to do this:
- Pick an individual entity that you can use as a reference, for example, an edge that is about six feet long, but that you know you want to be exactly nine feet long.
- Select the Tape Measure tool and measure that edge from beginning to end. You should see 6' displayed in the "VCB."
- Type the length you want the edge to be, 9', and then press Enter.
- A message asks, "Do you want to resize the model?" Click "Yes" to resize the entire model.
- Cover Story
-
 SketchUp Can Help You Win Interior..
 -
 Best Laptops for SketchUp
 -
 How to Resize Textures and Materials..
 -
 Discovering SketchUp 2020
 -
 Line Rendering with SketchUp and VRay
 -
 Pushing The Boundary with architectural
 -
 Trimble Visiting Professionals Program
 -
 Diagonal Tile Planning in SketchUp
 -
 Highlights of some amazing 3D Printed
 -
 Review of a new SketchUp Guide
- Sketchup Resources
-
 SKP for iphone/ipad
 -
 SKP for terrain modeling
 -
 Pool Water In Vray Sketchup
 -
 Rendering Optimization In Vray Sketchup
 -
 Background Modification In sketchup
 -
 Grass Making with sketchup fur plugin
 -
 Landscape designing in Sketchup
 -
 Apply styles with sketchup
 -
 Bedroom Making with sketchup
 -
 Review of Rendering Software
 -
 Enhancing rendering for 3d modeling
 -
 The combination of sketchup
 -
 Exterior Night Scene rendering with vray


