Tutorial
Turn Yourself into a Vase with SketchUp - Making Rotational Portrait Sculptures from Silhouettes for 3D Printing
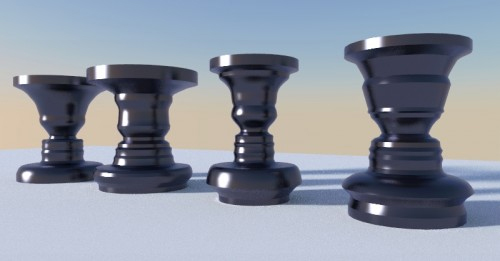
You likely have seen the effect before: An image like the one above shows some shapes that look like vases. After a little while, however, you notice that the curved shapes that define the vases are actually faces – or more specific: the negative silhouette of the faces.
As it turns out, this can easily be accomplished in SketchUp. Turning these shapes into real objects is also pretty simple these days as long as you have access to a 3D printer, a CNC lathe or can browse the web, where you can order 3D printed objects from any of the vendors that I list on this page. Follow these steps to turn yourself into a vase:
1. Take a good silhouette picture. Then import it into SketchUp. For this first step, we will be using a technique similar to the one that I employed for the tree cutout component in Chapter 5.
2. On the exploded picture, trace the outline of the silhouette. You can, of course, do this with the classic SketchUp line tool. But because faces are more curvy than straight, I prefer using the Bezier Spline plugin (see Chapter 4). The Catmull Spline tool is ideal for this and lets you trace the face easily.
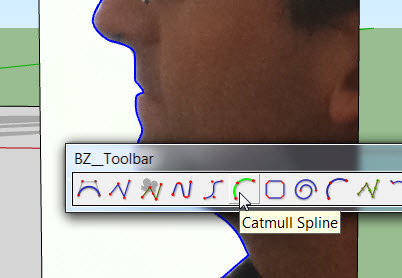
3. Once you are done tracing, you may have to do one or more of these steps:
- If you traced the outline using more than one segment, use the Weld plugin (get it from Smustard’s site) to combine all of the segments into one.
- You will likely have traced too fine around details such as the tip of the nose. This can cause problems with the Follow-Me tool. Right-click on the outline curve and select “BZ – Convert to > Polyline Divider for Animation”. This lets you segment the outline into regular polyline segments. Use a not too small but not too large number.
4. Now you can erase everything except the outline side of the face. You can also get rid of the image.
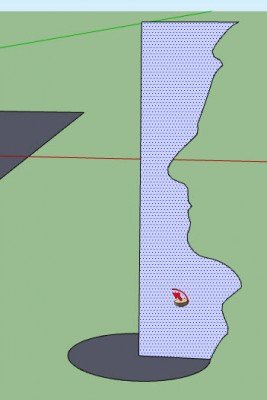
5. Now draw a circle at the base of the shape and use it to guide the Follow-Me tool to make a rotational object. Make sure it closes well. You should now have something that looks like this:
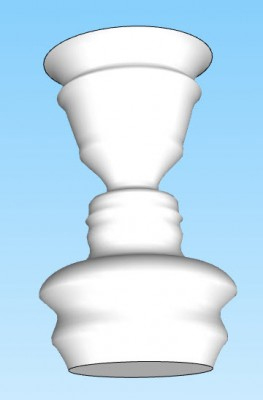
6. You can then close the ends and make additional modifications, such as extruding them into solid bases using the Push/Pull tool. As a final step, group everything.
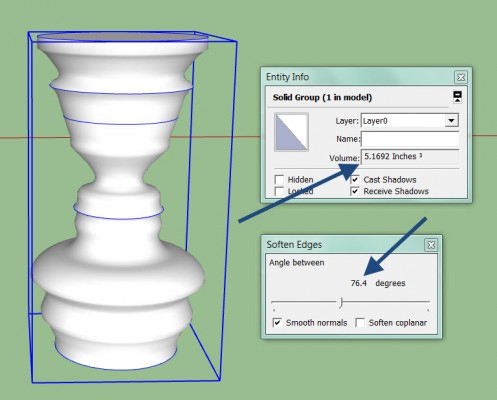
7. If you want the faces to appear smooth in SketchUp, open the Soften Edges window and select a high angle. Also, if you want to 3D print this shape, check in the Entity Info window that you can see a volume number. If no volume is being calculated, then this model is not watertight and you may have to fix it with the Solid Solver plugin first.
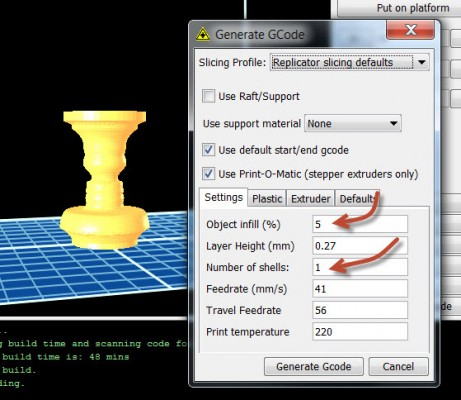
8. I printed the version that you can see in the image below using the MakerBot. I wanted a fast, non-structural print, so I set the infill to 5% and the number of shells to 1 (in the ReplicatorG software). If you want to make the shape more solid, set those values back to 10% and 1 (or more), respectively.
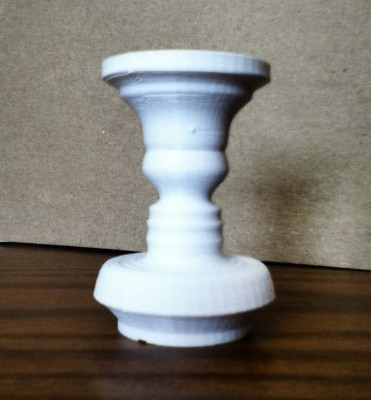
And that’s it! A few simple steps and you can surprise a loved one with a custom vase gift. Of course you can make other things using this technique, too. Great examples are candle holders (remember, the holidays are coming up!) or a chess set made from all of your friends or family.
Contact Name: Alex Schreyer
- Cover Story
-
 SketchUp Can Help You Win Interior..
 -
 Best Laptops for SketchUp
 -
 How to Resize Textures and Materials..
 -
 Discovering SketchUp 2020
 -
 Line Rendering with SketchUp and VRay
 -
 Pushing The Boundary with architectural
 -
 Trimble Visiting Professionals Program
 -
 Diagonal Tile Planning in SketchUp
 -
 Highlights of some amazing 3D Printed
 -
 Review of a new SketchUp Guide
- Sketchup Resources
-
 SKP for iphone/ipad
 -
 SKP for terrain modeling
 -
 Pool Water In Vray Sketchup
 -
 Rendering Optimization In Vray Sketchup
 -
 Background Modification In sketchup
 -
 Grass Making with sketchup fur plugin
 -
 Landscape designing in Sketchup
 -
 Apply styles with sketchup
 -
 Bedroom Making with sketchup
 -
 Review of Rendering Software
 -
 Enhancing rendering for 3d modeling
 -
 The combination of sketchup
 -
 Exterior Night Scene rendering with vray


