
Author : Paul Lee
Creating a plan of your SketchUp model in LayOut
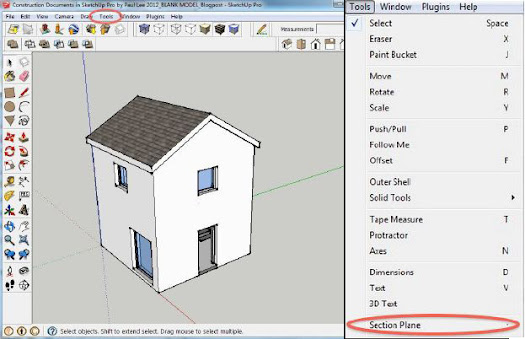
Creating a plan in LayOut is a snap. In this tutorial we will take a pre-formed model, apply a Section Cut and create a Plan Scene for display in LayOut. Below is a view of a house construction model you can download from here. Once you've opened this model (or one of your own), select the Section Plane tool from the Tools menu.
Use this tool to align the desired sectioned view of the model. (Remember: Hold down the shift key to maintain alignment while positioning your section cut.)

Under the Camera Menu, Set the view to Parallel Projection; notice that you've now provided straight-on view for your plan. Next, under Window, select the Scenes console. (Tip: you can hide the Section Plane itself in your LayOut document by opening the Styles window in SketchUp, and editing the default style of your scene to hide the section plane).
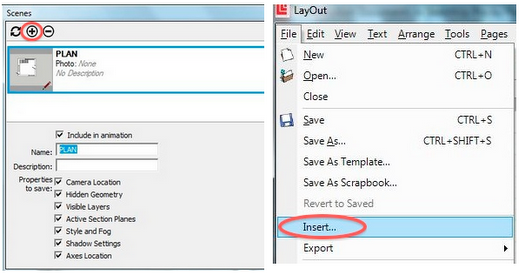
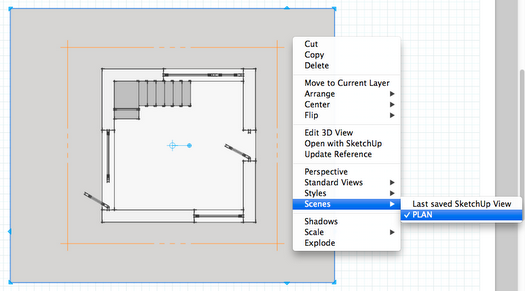
Now click on the “+” button and create a scene called “PLAN”. Open LayOut and access your SketchUp model by selecting File > Insert. From here, simply right-click on the SketchUp window and select Scenes: “PLAN”. Then right-click and go to Scale = 1mm:50mm. Your scaled plan is now finished in LayOut, and you're all set to start dimensioning and annotating the important details.

- Sponsored Plugins


- Sponsored Plugins

- Cover Story
-
 SketchUp Can Help You Win Interior..
 -
Best Laptops for SketchUp
-
How to Resize Textures and Materials..
-
Discovering SketchUp 2020
-
Line Rendering with SketchUp and VRay
-
Pushing The Boundary with architectural
-
Trimble Visiting Professionals Program
-
Diagonal Tile Planning in SketchUp
-
Highlights of some amazing 3D Printed
-
Review of a new SketchUp Guide
- Sketchup Resources
-
SKP for iphone/ipad
-
SKP for terrain modeling
-
Pool Water In Vray Sketchup
-
Rendering Optimization In Vray Sketchup
-
Background Modification In sketchup
-
Grass Making with sketchup fur plugin
-
Landscape designing in Sketchup
-
Apply styles with sketchup
-
Bedroom Making with sketchup
-
Review of Rendering Software
-
Enhancing rendering for 3d modeling
-
The combination of sketchup
-
Exterior Night Scene rendering with vray