
Sketchup Resources
- SKP for iphone/ipad
- SKP for terrain modeling
- Pool Water In Vray Sketchup
- Rendering Optimization In Vray Sketchup
- Background Modification In sketchup
- Grass Making with sketchup fur plugin
- Landscape designing in
Sketchup - Apply styles with sketchup
- Bedroom Making with sketchup
- Review of Rendering Software
- Enhancing rendering for 3d modeling
- The combination of sketchup &
BIM - Exterior Night Scene rendering with vray

Author :
GUEST ARTICLE

Step 3: Render in Kerkythea
1. Open Kerkythea, and use File / Open to open the exported image you saved. You should see a wireframe version of your view (the space shown will be a bit larger than the actual view, but the final product will mimic the SketchUp view).
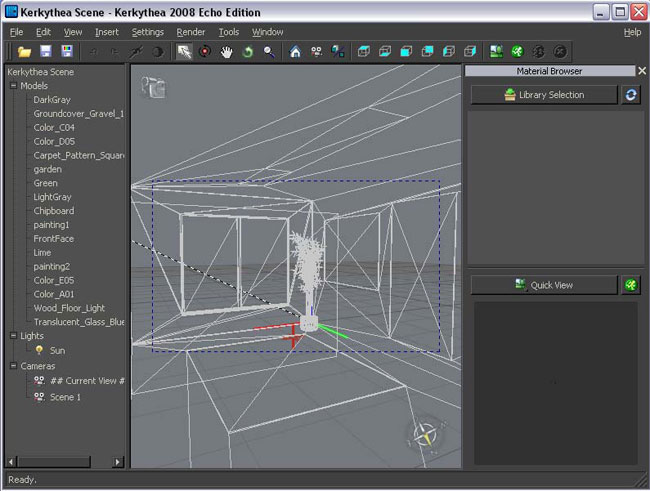 |
2. From the Kerkythea menu, choose View / Adjust / Solid Rendering (or press the V key). All the materials have their base colors, with no translucence (the windows are solid). In the Lights list along the left side, the only light is the sun outside, as it is defined in SketchUp.
 |
3. To see how this initial view would look after rendering, click the Start Render icon.
4. Accept the default settings (you can see that there many rendering options!) and click OK.
 |
This render shouldn't take much time, and you can see the progress in Kerkythea's title bar.
 |
When all is complete, the Quick View pane shows how the final render will look (pretty dark).
 |
5. To save this rendered image, click the Image icon.
6. This opens the Rendered Image window, in which you can see the full rendered scene according to the SketchUp view. It's dark because no lights are defined. If the image is too large, use the + and - magnifying glass icons. You could use the options and sliders on the left to adjust the image's properties, and if you wanted to save the image you would click Save. But since we'll be adding lights and other properties, you can skip saving this image (unless you just love it). Close this window.
 |
7. Back in the Kerkythea window, click one of the red rectangles in the ceiling, which represent the lights. Both rectangles are highlighted, and their material (Color_A01) is indicated with a star.
 |
8. Right-click on the material name, and choose Apply Material / Basic Pack / Diffuse Light. (As you can imagine, there are more material packs available, as well as other types of lights, but you can get great results with the default options that are provided.)
 |
9. We can now check how this will look: click Start Render again (this time it will take longer to complete), then click Image. The scene is now much lighter. To compare this scene with the one we'll create next, save this image (click Save in the Rendered Image window).
 |
10. Now we'll add a couple more properties. Click the blue window of the room, whose translucent glass material now gets the star.
| Previous | Next |