
Sketchup Resources
- SKP for iphone/ipad
- SKP for terrain modeling
- Pool Water In Vray Sketchup
- Rendering Optimization In Vray Sketchup
- Background Modification In sketchup
- Grass Making with sketchup fur plugin
- Landscape designing in
Sketchup - Apply styles with sketchup
- Bedroom Making with sketchup
- Review of Rendering Software
- Enhancing rendering for 3d modeling
- The combination of sketchup &
BIM - Exterior Night Scene rendering with vray

Author :
Guest Article
I recently received an email from a reader asking for more information about the post I wrote on keeping the file size down in a model. What he wanted to know was the correct process to draw a component that was made of multiple components, each one representing a part of the entire. This particularly applies to those components that are created with the use of the Follow Me tool, such as knobs, columns or finials, but can also be generally referred to all those components that present a symmetry. One problem he encountered was when he tried to extrude a quarter of the component with the Follow Me tool and each instance didn’t match correctly with the next one, leaving an unacceptable gap.
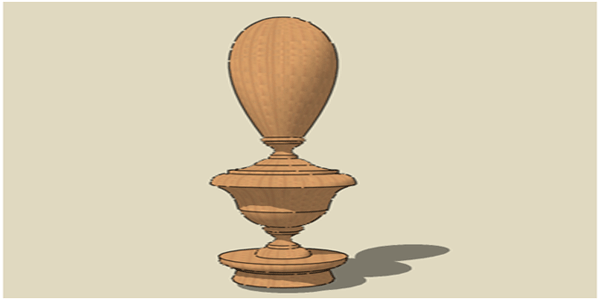
In this post I’ll go through the entire process, drawing a finial made of four components, each one representing a quarter of the entire. This technique is indicated and suggested to keep the size of complex models within an acceptable dimension.
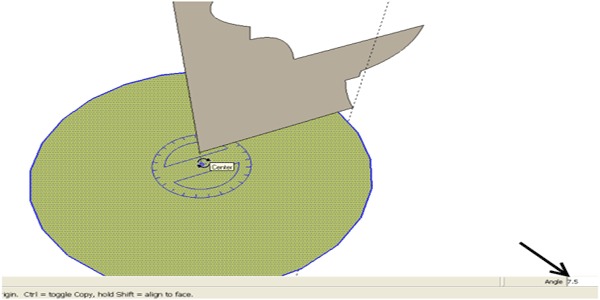
To start with, I imported the profile of a finial I found in my hard disk. After having resized the picture and copied the profile using lines, arcs and Bezier curves, I traced a guide line from the centre of rotation and drew a 24 segments circle, which is the default value when you draw a circle in SketchUp. If you take a closer look to the image below, you will notice that the vertex of two of the segments that compose the circle is aligned with the profile of the finial; to make it more visible, I traced another guide line. Notice that the segment of the circle is not orthogonal to the profile of the finial and this would cause the trouble the reader experienced when extruding a quarter of the profile with the Follow Me tool.

To make the Follow Me tool work properly, I need to rotate the circle to have the segment orthogonal to the profile. Doing some math: 360°/24=15°, 15°/2=7.5°. This is the value of rotation of the circle.
Now that the circle is properly set, I trace two lines that define a quarter of the circle and erase the unneeded lines.
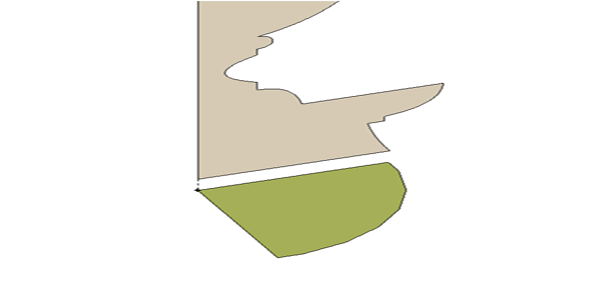
I run the Follow Me tool, first selecting the arc of the circle, clicking on the tool and then on the finial profile face. The extrusion will create a solid shape but, since this is only a part of four, I erase the internal lines to have a hollow shape. I select the entire geometry and make it a component.
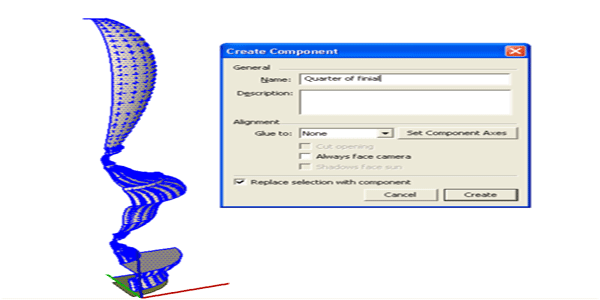
I use the Rotate tool with the copy function activated (hit the Ctrl key for that) to create three instances, each rotated by 90°. You can see in the picture below that there are seam lines on the edge of each component.
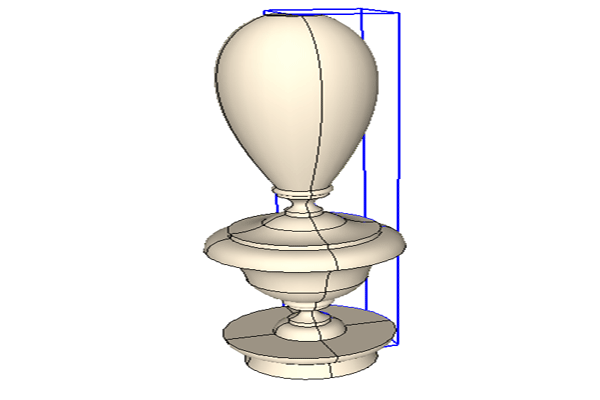
It is possible to hide these lines using the Erase tool with the Shift key pressed. This will make the component look more natural.
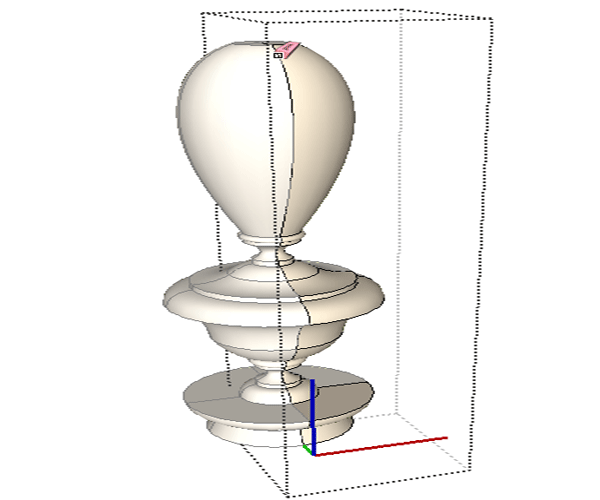
Now I make the finial a single component and save it in my library for future use.
To see how much size I saved using this method, I also extruded the finial as a single component, using the Follow Me tool on a complete circle. In this case, the finial involved 17500 entities! The size of the component was of 2.25 MB. Using the illustrated technique, each quarter of the finial involved 5375 entities and the entire finial was only 279 KB, about 1/8 of the of the single component size.
I think that this is a very good reason to make components from smaller components!