
Sketchup Resources
- SKP for iphone/ipad
- SKP for terrain modeling
- Pool Water In Vray Sketchup
- Rendering Optimization In Vray Sketchup
- Background Modification In sketchup
- Grass Making with sketchup fur plugin
- Landscape designing in
Sketchup - Apply styles with sketchup
- Bedroom Making with sketchup
- Review of Rendering Software
- Enhancing rendering for 3d modeling
- The combination of sketchup &
BIM - Exterior Night Scene rendering with vray

Author : Bonni Roskes
Spaceship to Mars, in Google SketchUp
I got the idea for this project from a math teacher in Italy, who used a child's hand-drawing to model both a rocket
and the background image. I blogged about his project here:
http://3dvinci.blogspot.com/2011/02/traveling-through-space-in-sketchup.html.
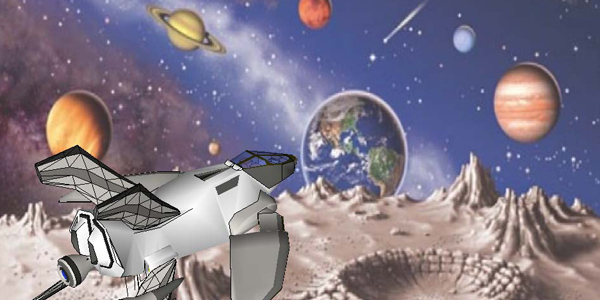
I tried it myself using a spaceship from the 3D Warehouse and a background image also found online:
You can see my animation here: http://3dvinci.blogspot.com/2011/03/spaceship-animation.html.
This project will work in any version of SketchUp, including SketchUp 8.
For this project, it helps to have some basic knowledge of Google SketchUp (though detailed instructions are provided). In particular, it's important to know how to zoom, rotate, and pan the view. If you need more information on how to get started, and a description of some basic tools, please read 3DVinci's Getting Started Guide (PDF):
PC users: go to http://www.3dvinci.net/SketchUp_Intro_PC.pdf.
Mac users: go to http://www.3dvinci.net/SketchUp_Intro_MAC.pdf.
Step 1: Set up the Background
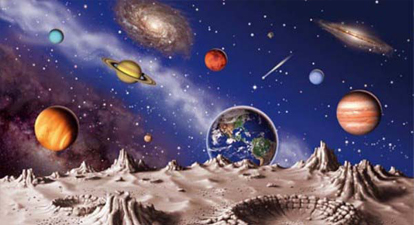
1. Before getting started in SketchUp, go and find an outer-space image you want to use as your background. I just did a search for "outer space" in Google Images, and this was one of the first to come up. For the image you like, open the largest version you can find of it (not a thumbnail), right-click on it, and choose one of the saving options. Remember where you save it!
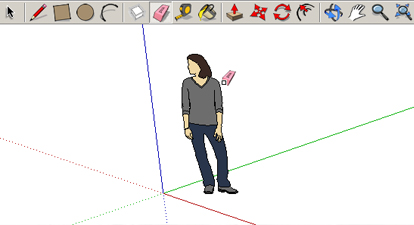
2. Open Google SketchUp. If your file contains a person standing on the ground near the origin, click the Eraser tool and erase him / her.
You can either set up the background first and then find a spaceship model, or get the model first. I did the latter (finding the model first) since I thought it would be easier to import a rocket into a "blank" model rather than one with a colorful, busy background. But the order you use doesn't matter. (Of course, if you're a SketchUp whiz, you'd create your own rocket model from scratch, but I'm taking the lazy way out here!)
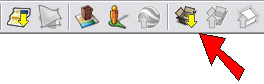
3. Click the Get Models tool.
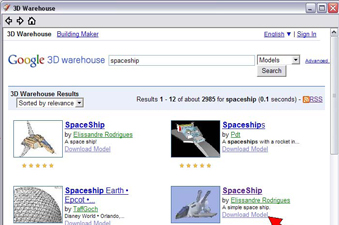
4. This opens the 3D Warehouse search page; enter a term such as "rocket" or "spaceship." The one I picked is indicated below; click the "Download Model" link.
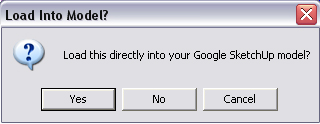
5. When asked if you want to load the model directly, click Yes.
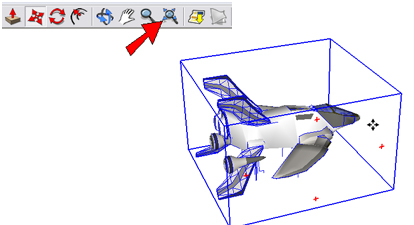
6. Click anywhere to import the spaceship - the size and orientation don't matter (yet). If you can't see the model, it might be too large or small, so click Zoom Extents to size the view so that everything is visible. The entire model is surrounded by a box, because it's a component (a single object), and it's selected. You can right-click in blank space to unselect it.
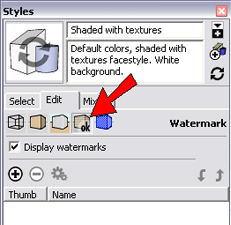
7. Now we can add the picture to the background. Open the Styles window (Window / Styles), and click the Edit tab.
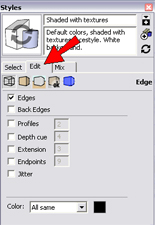
8. Then click the Watermark icon. Make sure Display watermarks is checked
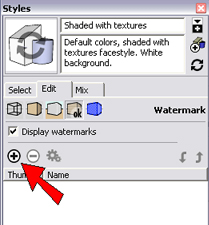
9. To add the image, click the "plus" icon.
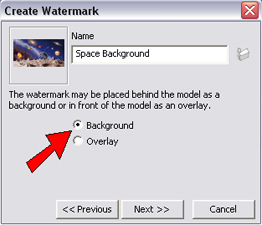
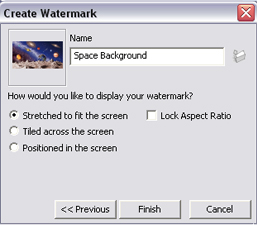
10. Browse to the image you saved and import it. In the Create Watermark window, choose Background so that the model itself will appear above the image (as opposed to using the image as an overlay). Assign a name for this background if you like. Then click Next
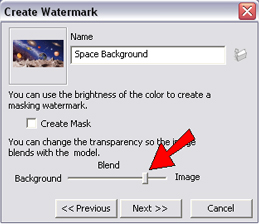
11. On the next window, you can adjust the slider to control the blend of the image. A lower value fades the image, which is handy if your image is too dark, or it you want it to look more muted. Then click Next again.
12. On the last window, keep the image stretched to fit, and uncheck Lock Aspect Ratio so that the entire screen will be filled. Your image might become a little distorted, but probably not enough to notice! Click Finish.
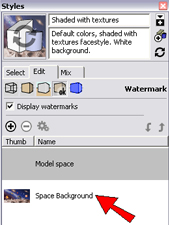
Back in the Styles window, this is what you should have: the background image right below Model Space. (If it were above Model Space, the image would be an overlay, which would appear "above" the model. An overlay wouldn't work for a background image like this, but it's handy for things like company logos.)
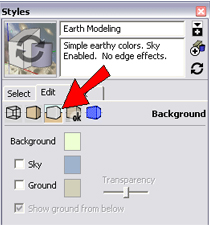
13. If your model template uses different colors for sky and ground, you need to change this. Open the Background settings, and remove both Sky and Ground. Background color isn't important, since the background image is used instead of a solid color.
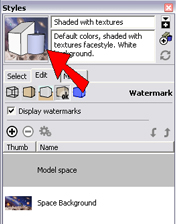
14. You've made changes to the style, but these changes won't be saved until you update the styles. To do this, click the large thumbnail at the top of the Styles window. This removes the curvy arrow icon, and the style is now "official."
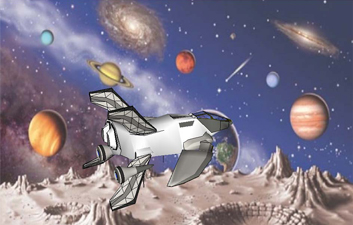
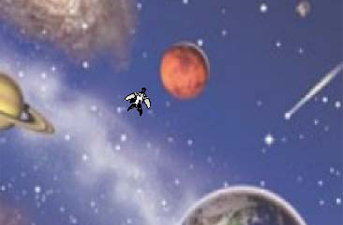
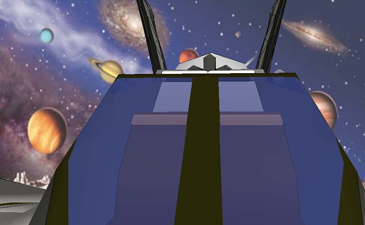
This is what you should see: the spaceship you downloaded, with the outer space background.
Step 2: Create Scenes
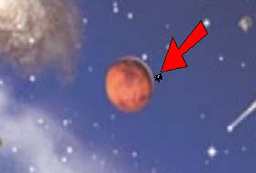
Now we can build the actual animation. The spaceship doesn't really travel anywhere, you'll just save various views of it getting smaller, then larger, so that it appears to be traveling to of the planets and then returning. I'm using Mars as my destination, which I assume is that red-orange ball in the middle of my background image.
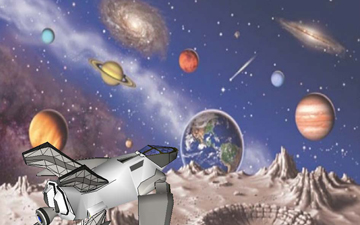
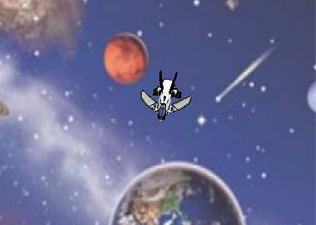
1. Use the Orbit and Zoom tools (of course with your three-button mouse, not by clicking those actual tools) to get your spaceship into the starting position. My image has a planet surface on which to "park" but you could also start in mid-air.
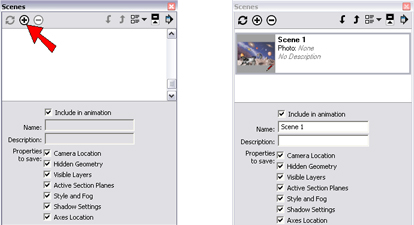
2. Open the Scenes window (Window / Scenes) and click the "plus" icon to save this view. The scene is called"Scene 1" by default, but you could change this name if you want. Once a scene is created, it is listed as a tab at the top of your SketchUp window, and you can click this tab to return to the view.
3. Zoom out so your spaceship looks as if it's farther away, headed toward its destination.
4. Click the "plus" icon again to save this scene.
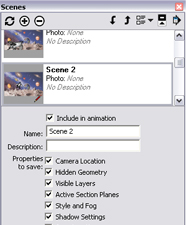
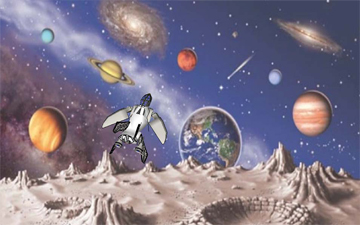
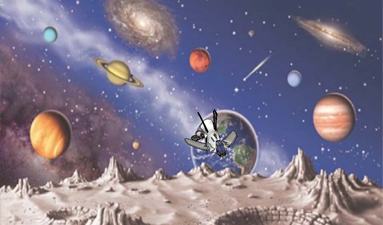
5. Proceed the same way, saving a new scene at each travel point of your spaceship. You can save as many scenes as you like, but seven or eight is a good number - three scenes en route to Mars, a few scenes where the ship appears tiny as it ducks "behind" Mars, and three or four scenes for the route home. Here's my third scene:
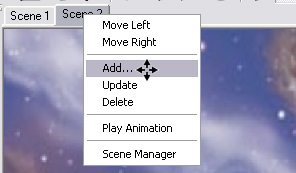
You can close the Scenes window and still be able to create more scenes. Just right-click on the scene after which the new scene will go, and choose Add.
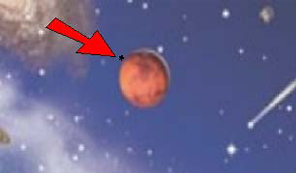
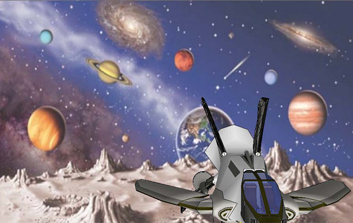
6. Fourth scene - the spaceship appears so small you can barely see it:
7. Fifth scene - spaceship is still tiny but has emerged on the other side of Mars.
8. The next few scenes show the spaceship getting larger:
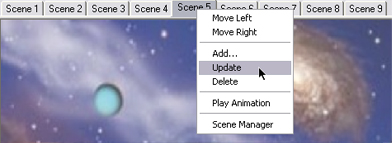
9. After your set of scenes is created, click each to see how smoothly (or not) the spaceship appears to travel. You'll probably have to make some adjustments to some of the middle scenes, where the spaceship is turning around for the journey home. Each time you make a change to a scene, right-click on the scene's tab and choose Update, otherwise your change will not be saved.
If the transition between any two scenes seems too sudden or choppy, you can add a "spacer" scene between them. Get the view you want for this new scene, right-click the scene tab after which the new scene will go, and choose Add.
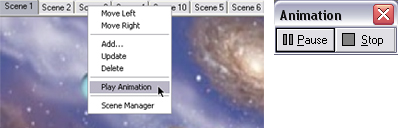
10. Finally, to set your spaceship in "motion," right-click on any scene tab and choose Animation. You can stop the animation with the Stop button.
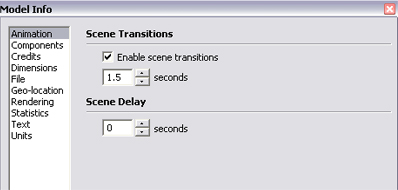
11. You can adjust the smoothness and length of your animation by opening Window / Model Info, and opening the Animation page. Increase the seconds of scene transitions to get a slower animation, and reduce the scene delay to eliminate the "start-and-stop" motion at each scene.
12. Finally, if you want to export your animation as a movie, choose File / Export / Animation. For export options, click the Options button.

13. These options are pretty self-explanatory, but they affect the file size of your movie. Smaller width and height reduce file size, and a lower frame rate does as well, though too few frames can make the movie look choppy.
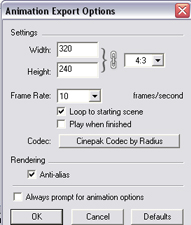
When I produced my animation using the above settings, the AVI file was about 11 Mb, which is rather huge for a short movie with no sound. But you can use video editing to reduce the size, add some sound, etc.
If you try this project and have an animation you'd like to share, please let me know! I would be happy to blog about your project, and include in an upcoming newsletter.