Sketchup Resources
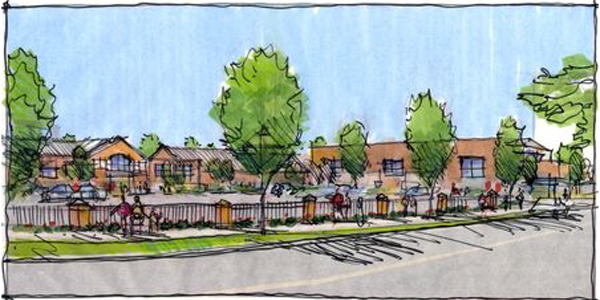
A Denver architect friend Alan Ford and I recently interviewed for a master planning project with the Montclair International School wanting to expand onto their existing five acre campus. Our interview was scheduled for a total of 45 minutes and we chose to add an exciting level of interaction to the conversation by creating some hand drawings during the interview!
This challenge required advance preparation of a Google SketchUp model, digital photographs of the site and some very quick drawing “on the fly”. Shown below are the two drawings I quickly generated in 30 minutes during our interview and how I was able to produce them in such limited time!
 |
SketchUp Model Base. I first downloaded an aerial photograph of the school site from Google Earth and imported it into Google SketchUp. I resized the base to the exact scale and created a massing model of the existing campus buildings. Due to the nature of our interview, the SketchUp model included basic building shapes but no facade detail.
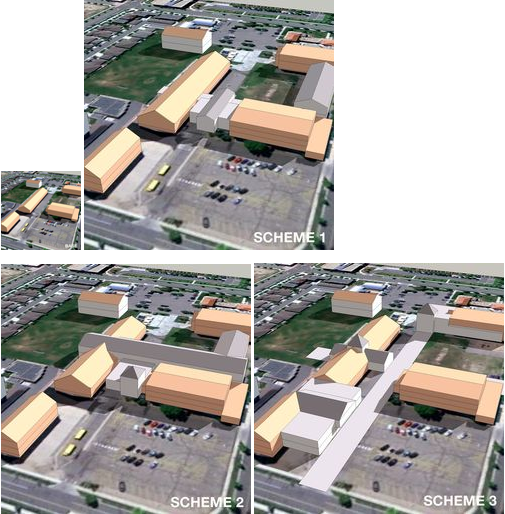 |
Campus Expansion Schemes. Several days before the actual interview, Alan and I explored a few SketchUp model options for expanding the school campus. Three big ideas were presented on a laptop and discussed during the interview. I chose Scheme 3 to illustrate during the presentation.
 |
Scheme 3 SketchUp View. Once I saved this low angle aerial perspective, I exported a high resolution jpeg. Due to the contrast and bright color, I brought the image into Photoshop and lightened the overall tones.
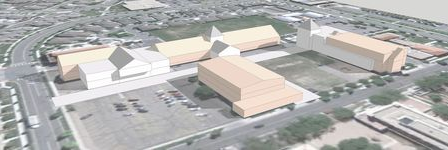 |
Ink Jet Print. I printed the lightened image on 13”x19” coated bond paper with an Epson Workforce 1100. Using the print as a base for my “interview drawing”, I added some very light pencil lines to block out tree locations, windows and other site details. This advance preparation allowed me to complete the drawing quickly during the presentation.
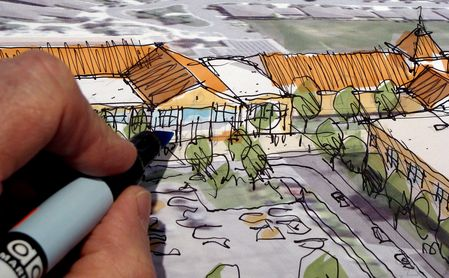 |
Ink Lines and Color. All of the ink linework and marker color was achieved in twenty minutes during the actual interview. I used a Pilot Precise Rolling Ball pen to illustrate the building edges, trees, cars, windows and site details. I “pre-selected” about six Chartpak AD markers and colored with them for the walls, roofs and landscaping.
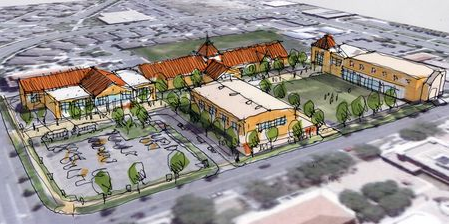 |
Completed Aerial Perspective. The combination of SketchUp model, aerial photograph and hand drawing resulted in a successful hybrid visualization of Scheme 3. Working this quickly in front of a potential client demonstrated our ability for rapid communication of ideas in an interactive workshop setting. The client was thrilled with our ideas and “can do” attitude.
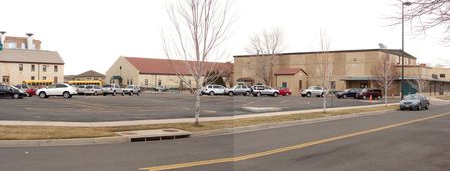 |
Site Digital Photograph. I stitched two digital images together to create a panoramic view of the main entrance and school parking area. I printed the image on 11”x17” paper and used it as a base for a quick "overlay and trace" sketch during the interview.
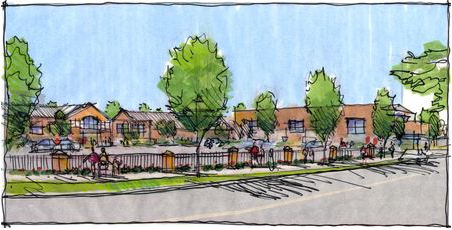 |
Overlay and Trace Sketch. During the presentation, I taped a sheet of tracing paper over the photograph and drew a quick sketch with a Pentel Sign pen of the street view adding a new perimeter wall, modified campus buildings and landscaping. I used Chartpak AD markers for a simple color scheme. This drawing had much less detail than the aerial perspective and took only about 10 minutes to create