With this tutorial I will try to explain step by step stages to model Buzz Ligthyear with Sketchup.
We start from the head.
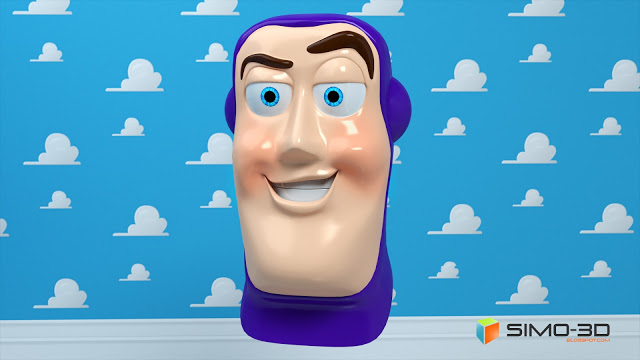
The first thing to do is to search the network for a 'picture that allows us to have a vision of' the subject from various points of view as a blueprint.
So we begin to draw the contours of the profile and then create a model of the head pretty rough.
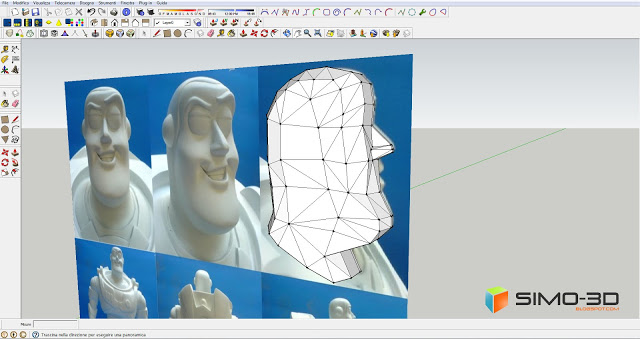
We create a mask outlining the face and all its parts, eyes, eyebrows, mouth, nose ... you do not need because we already sketched.
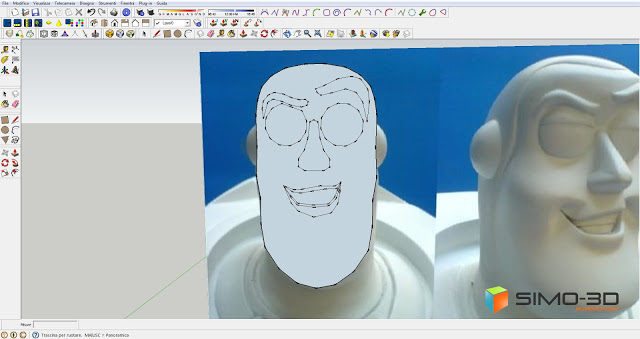
At this point we position the mask in such a way as to center it perfectly in front of the solid of the head, then we project all its parts as in the picture below. Then highlight the whole thing and with the right mouse button, from the menu, click on "intersect faces" - "with the pattern" .
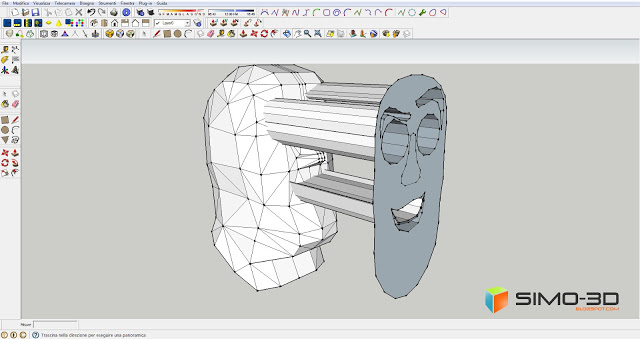
As you can see, after clearing the mask, remain on the solid segments of intersection of the projections. Now we can begin to shape the face starting from the eyebrows.
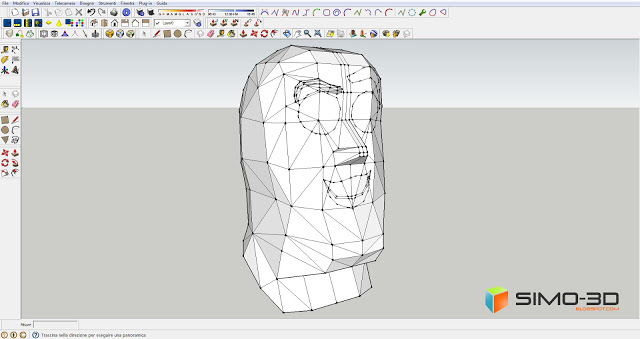
Draw a border around the eyebrow, that in 'picture I just colored yellow to highlight it, this will allow us to have a break over the net with his forehead when we use the plugin "Subdivide and Smooth." Same thing we do with the other eyebrow.
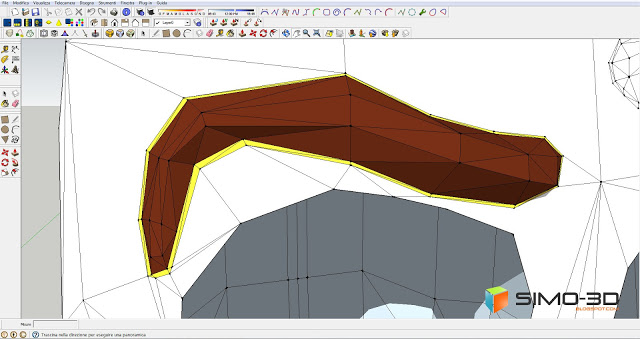
We model the rest, occasionally use the plugin " Subdivide and smooth "to verify that the result is what you wanted and no inaccuracies.
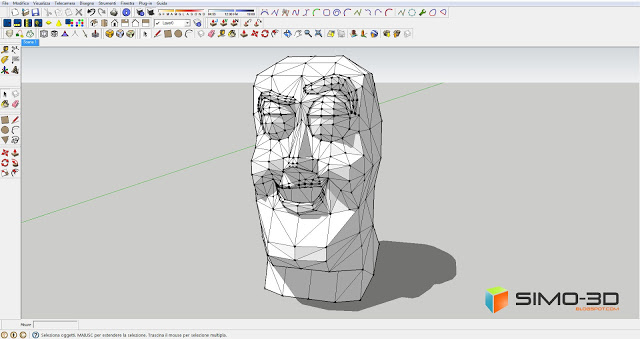
Finished sculpt the face, always with " Subdivide and smooth ", we set l '" Iterations "to the value 2, this will give us a good roundness of the edges, like the photo below. To better understand the steps performed up to this point you can download the template HERE.
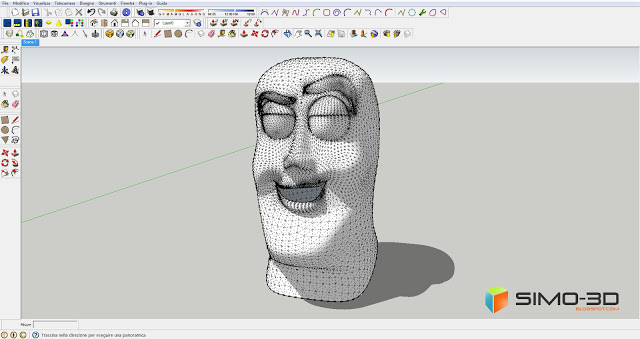
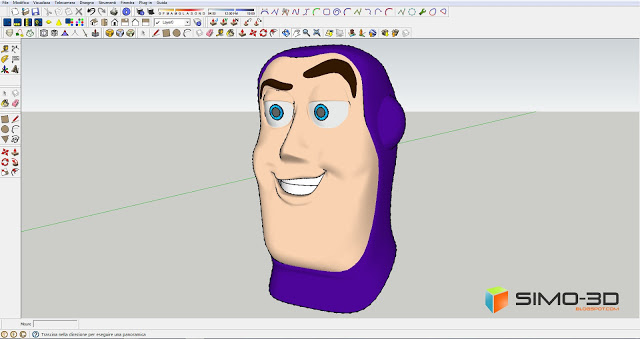
If the result satisfies us it's time to color. It should bring the model before using the plugin, we color all the parts and then with the plugin " Subdivide and smooth ", as well as setting the '"Iterations" to the value 2, we click the "On" to "Copy Materials" in this so we will not lose the colors set.
To create the cap copy the model of the head before the " Subdivide and Smooth "and using the same plugin, this time we set l '" Iterations "to the value 1 then create a mask that will determine the shape of the hood on the face. Then, after you have highlighted all, with the right mouse button open the drop-down menu and click on "intersect faces" - "with the model."
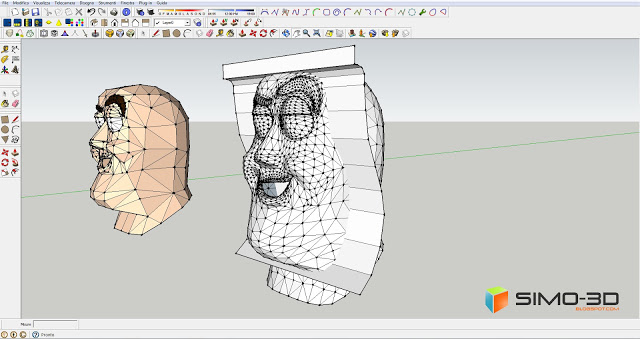
Delete the whole part of the face that we are not interested and we create, to 'opening, a rim inwards to give it some 'thick, just copy the segments of the same and reduce its size. Now we can round up better with the plugin "Subdivide and smooth" setting the value "Iterations" still at 1.
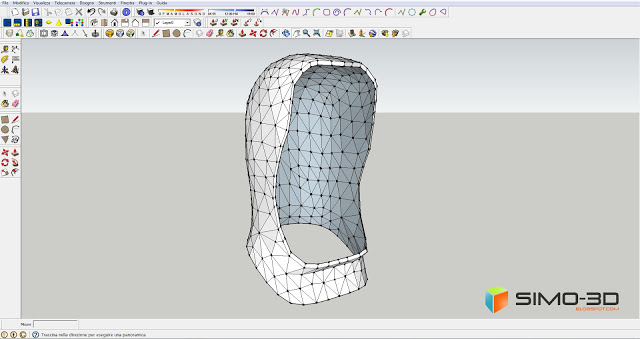
Set the cap and having it colored,
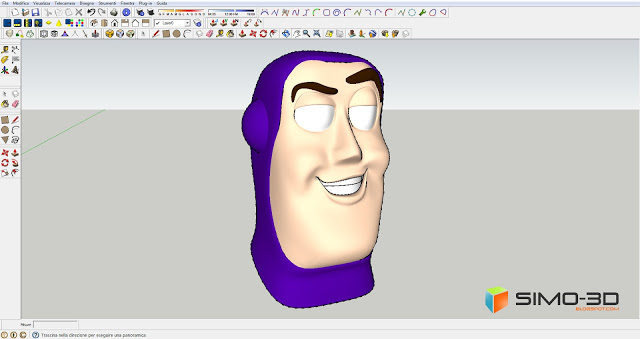
the same way as when we screened the shape of the eyes, eyebrows, etc.. we project the iris.
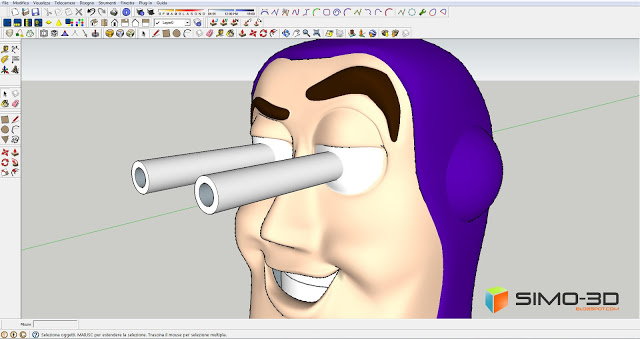
It can happen that by doing this, especially when the models are more complex, the result of the projection is not perfect so it will need a little work.
Remember that the plugin "Subdivide and smooth" requires a few minutes of processing (also depends on our pc) that increase if you click" On "to" Copy Materials "also means an increase in size, which means a greater weight of mock up.
- Cover Story
-
 SketchUp Can Help You Win Interior..
 -
 Best Laptops for SketchUp
 -
 How to Resize Textures and Materials..
 -
 Discovering SketchUp 2020
 -
 Line Rendering with SketchUp and VRay
 -
 Pushing The Boundary with architectural
 -
 Trimble Visiting Professionals Program
 -
 Diagonal Tile Planning in SketchUp
 -
 Highlights of some amazing 3D Printed
 -
 Review of a new SketchUp Guide
- Sketchup Resources
-
 SKP for iphone/ipad
 -
 SKP for terrain modeling
 -
 Pool Water In Vray Sketchup
 -
 Rendering Optimization In Vray Sketchup
 -
 Background Modification In sketchup
 -
 Grass Making with sketchup fur plugin
 -
 Landscape designing in Sketchup
 -
 Apply styles with sketchup
 -
 Bedroom Making with sketchup
 -
 Review of Rendering Software
 -
 Enhancing rendering for 3d modeling
 -
 The combination of sketchup
 -
 Exterior Night Scene rendering with vray


