
Author : Irmin Verstappen
The Making of the Kitchen
B. The settings
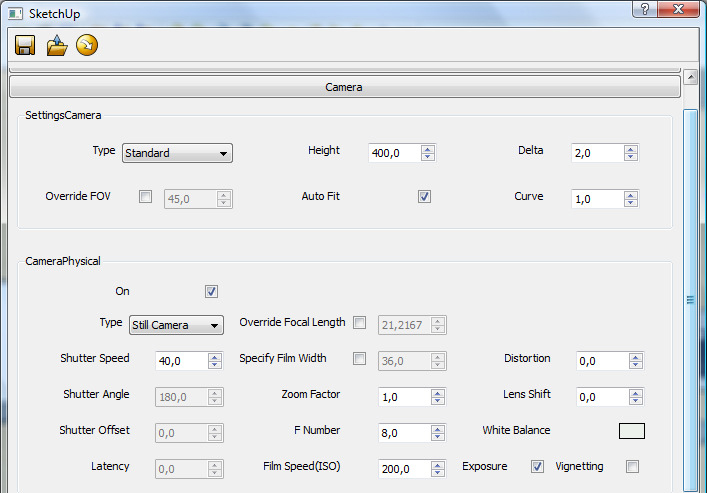
As you know, there are many good settings for interior renders to be found on the net, but for me I find the best results are when I render my models with an HDRI as lightsource. So I start of with the camera settings, I lower the shutter speed to a value between 30 and 50 to brighten up the picture, and also increase the film speed to somewhere between 175 and 225. In this scene, there are a lot of windows, so there a lot of daylight in the scene.
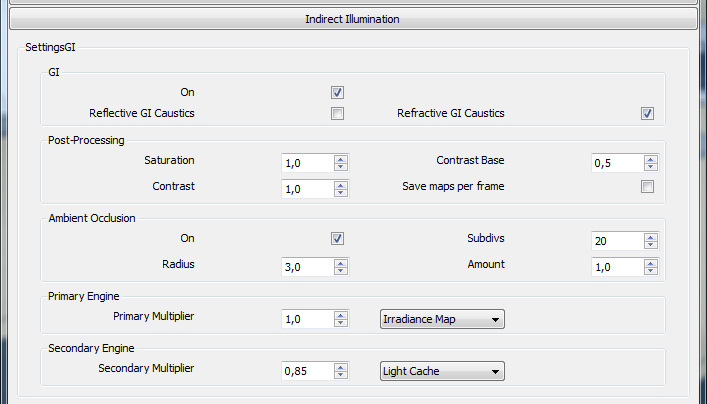
As I mentioned, I try to create a more realistic render with the help of an HDRI picture. You will have to experiment a little with the multiplier. In this scene I increased it to 10, that way I wouldn’t have to bring in extra lights into the model. Also use the same HDRI as a background. Make sure to set the HDRI as an environment
Make sure to activate the ambient occlusion, that way you will get nice clean corners. The more subdivs, the better the result. My primary engine remains the ‘Irradiance map’, the second is the ‘Light cache’…
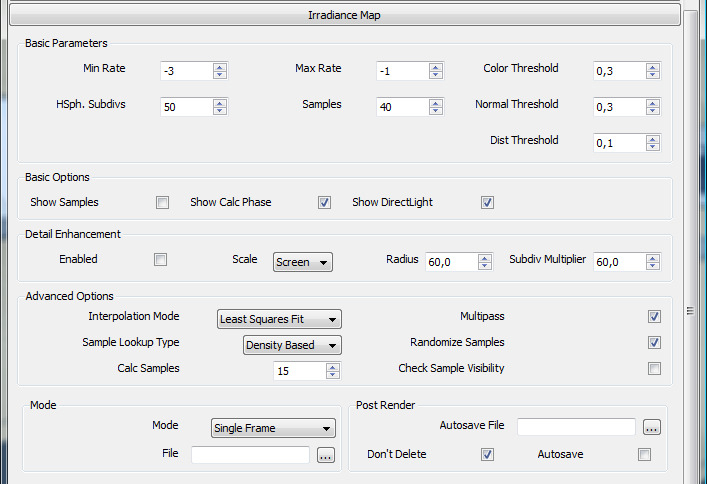
The settings for the irradiance map.
The only thing I changed are the samples, I increased them to 40.
The light cache settings: The higher the value of the subdivs, the better you result, but it will have a direct impact on your render time. So, make sure you adjust it to your needs…
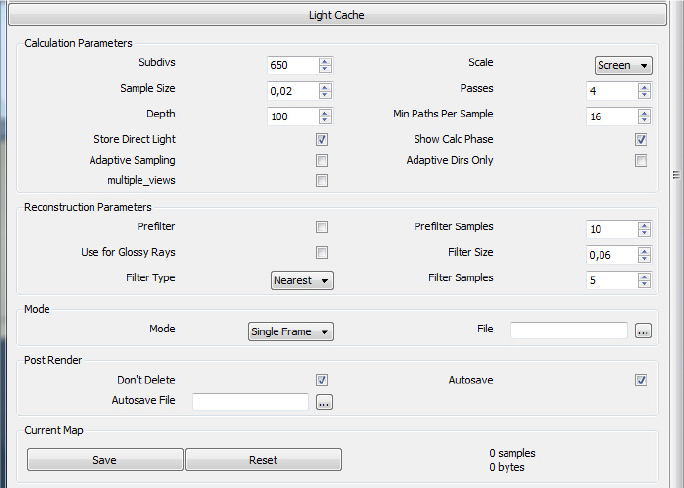
The rest of the settings weren’t changed, and are the same as the SU_default visopt.
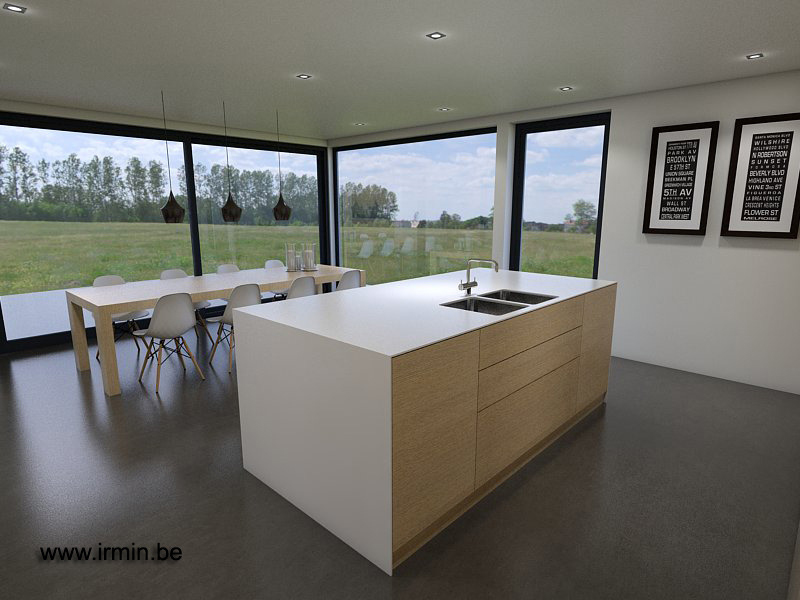
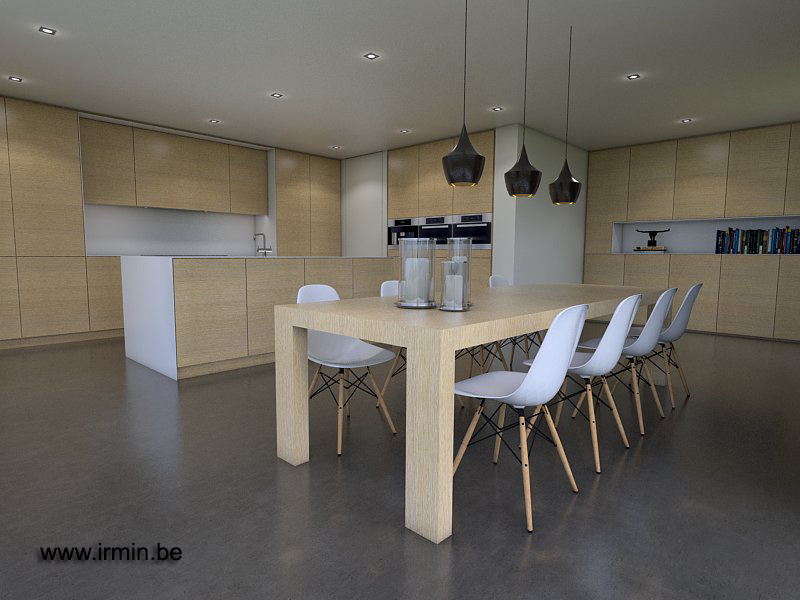
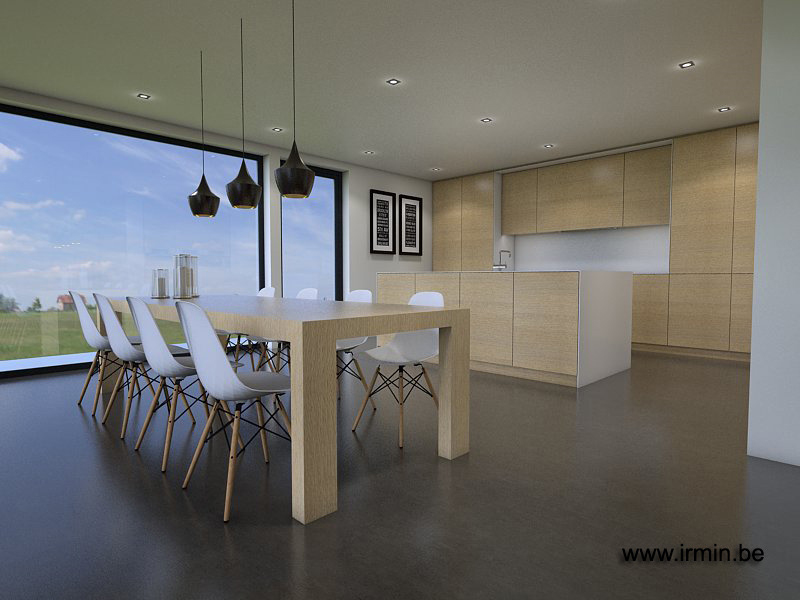
C. The result, without post- processing in photoshop

- Sponsored Plugins


- Sponsored Plugins

- Cover Story
-
 SketchUp Can Help You Win Interior..
 -
Best Laptops for SketchUp
-
How to Resize Textures and Materials..
-
Discovering SketchUp 2020
-
Line Rendering with SketchUp and VRay
-
Pushing The Boundary with architectural
-
Trimble Visiting Professionals Program
-
Diagonal Tile Planning in SketchUp
-
Highlights of some amazing 3D Printed
-
Review of a new SketchUp Guide
- Sketchup Resources
-
SKP for iphone/ipad
-
SKP for terrain modeling
-
Pool Water In Vray Sketchup
-
Rendering Optimization In Vray Sketchup
-
Background Modification In sketchup
-
Grass Making with sketchup fur plugin
-
Landscape designing in Sketchup
-
Apply styles with sketchup
-
Bedroom Making with sketchup
-
Review of Rendering Software
-
Enhancing rendering for 3d modeling
-
The combination of sketchup
-
Exterior Night Scene rendering with vray